Archives

Plant now for a long Tulip season

Tulip lovers stretch the season by planting lots of different species and cultivars. Though each only blooms for a short time, the tulip parade can last two full months if you plan it carefully.

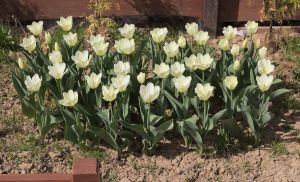
Tulipa fosteriana 'Purissima'

Tulipa fosteriana ‘Purissima’

Early: The first tulips are low to the ground, including the wide-leafed Kaufmannianas, sometimes called water-lily tulips because of the shape of the flowers, and Gregii’s, known for their mottled leaves. Soon after them come Emperor, aka Fosteriana, tulips, the earliest of the long-stemmed types; Single Early, which is usually slightly taller than Emporor; and Double Early, ditto.

Mid Season: Once the days lengthen and weather warms up, you’ll get Triumphs, first of the truly long-stemmed florist’s types, which come in a wider range of colors than the early birds. Also Peony-flowered tulips, known for their lush doubleness; and Giant Darwin, the florist’s tulip on steroids.

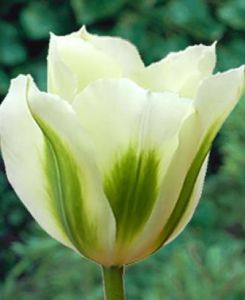
Viridiflora tulipan (Viridiflora tulip)

Viridiflora tulipan (Viridiflora tulip)

Late: This is the season for Darwin tulips, also known as Single Late, the classic tall-stemmed cups of color that first come to mind when you hear the word tulip. It’s also the time for exotica: huge Parrot tulips, with their twisted and ruffled petals; urn-shaped Lily-flowered tulips; Viridifloras, with flames of green rising up the outside of the brightly colored flowers; and Fringed tulips, sometimes listed as Tulipa crispa, their petal edges frilled with narrow teeth that glow when the light shines through.

Species: There are dozens of species tulips available, primarily through mail order. Smaller and more delicate than garden tulips, they are mostly mid-season bloomers, with a few earlies, such as the tiny white T. biflora, and a few members of the late show, such as the bright red T. wilsoniana (T. montana). The available array keeps growing, so it is best to buy from a purveyor who is clear about blooming time in the catalog.
Storing Tender Bulbs/Corms

By Kathy McCarthy

Do you love plants that have tender bulbs but think it is too much trouble to store them over winter? Hang on folks. The results may be worth your efforts and this is a great way to increase your supply. The directions are for plants I have been successful in storing.

Remember to dig carefully. It is important to loosen the roots gently, digging a few inches away from the plant. You want to avoid cutting or breaking the fleshy structure. Diseases enter through cuts and bruises.

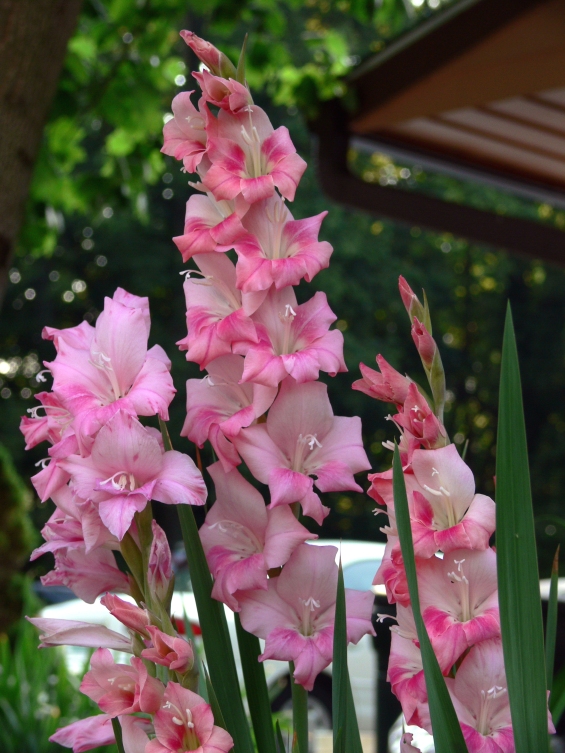
Gladiolus

A gladiolus ““bulb”” is really a corm, a swollen underground stem. A new corm forms on top of the old one. While this is taking place, small new cormels are produced from the base. Corms can be dug when the foliage begins to yellow or before a hard freeze. After carefully digging the corms, cut off the old leaves close to the corm. Leave the corms outside in the sun for a day or two and then spread out in a garage or similar place to cure, but not on a cement floor. This will prevent storage rot. After a few weeks of drying, clean them by removing the roots and outer sheath of corm. Remove and discard the old corm. Store the corms in a mesh bag and hang them out of the way in a cool well-ventilated area. I use a mesh onion bag and hang it in my basement. The small cormels can also be saved and planted the following year, but it will take a few years to produce blooming plants.

Cannas

Dig the rhizomes in fall before the first frost. Remove the old stalks and gently brush off soil. They can be washed with a garden hose. Let them dry for a few days before storing. I store my rhizomes in a box filled with vermiculite. However they can also be stored in peat moss. Another way to store cannas is to leave the soil on the rhizomes and pile the clumps in a box. Cover with plastic and store in the basement or other dark, cool, dry area. I put the box on top of another container to keep it off the cement floor. Rhizomes must not freeze during storage. The temperature should be between 50 and 60 degrees. Never store canna rhizomes in a mesh bag, as this will allow the bulbs to dry out.

Calla Lily

Bulbs should be lifted out of the soil in late fall, but before the first frost. The bulbs bruise, so handle them carefully. Remove the excess soil by either washing or carefully rubbing it off. Dry the bulbs away from direct sunlight or wind for several days. Put them in a paper bag and store them in your basement or other dark, dry location. Like cannas, the temperature should be between 50 and 60 degrees.

Label and Check

When storing, I label the containers carefully. You can use a permanent felt marking pen to write directly on the fleshy root. I find it helpful to attach a sheet of information regarding planting time, depth, etc. to the container.

During the storage season, I periodically check for damaged or rotting material. Any damaged material is removed and thrown away. You don’’t want one bad ““apple”” to spoil the whole bunch.

Once spring arrives, you will be glad you saved those tender bulbs. If you have more corms, rhizomes and bulbs than you can use, think of your fellow gardeners and give them away.

Summer Bulbs

Overwintering Summer Bulbs

by Diana Alfuth, horticulture educator for Pierce & St. Croix County UW-Extension

gladiolus_7-19-06

Tender summer gladiolus

Summer bulbs cannot make it through our cold Wisconsin winters. If you want to plant them again next year, tender bulbs must be dug and stored once the foliage begins to yellow or is killed by frost. Cut the foliage to about 2 inches, dig the bulbs with a spading fork and knock off most of the soil. Don’t wash canna, dahlia or caladium bulbs, but hose off others, if needed. Discard any bulbs with spots or sunken areas, which may indicate the presence of disease.

Once bulbs are dry, pack them with some peat moss, sawdust, perlite, vermiculite or sand, or put them in thick paper bags and place them in a cool, dry place for winter. A root cellar, unheated basement or extra refrigerator can be used to keep temperatures between 50 and 65ºF, or 35 to 55ºF for gladiolus. Don’t store bulbs with ripening fruit, such as apples. The fruit gives off ethylene gas, which can damage bulbs.

Check the bulbs periodically over the winter. If mold is present, spread the bulbs out to dry or otherwise reduce humidity. Separate the bulbs prior to planting next spring.

Planting Summer Bulbs

from The New York Times column ‘Garden Q&A’

Summer bulbs are tropical types that want summer conditions. They will start sprouting when the soil is still less than toasty, but if it is downright cold, they’ll sulk, and if they sulk in soil that is damp as well as cold, they’re likely to rot.

So people in short-season areas have two options: the first is simply to wait for warm weather and then wait for flowers; the other is to give plants like crocosmias, acidantheras, and dahlias a short head start indoors.

Since you don’t want to have to worry about providing greenhouse conditions, wait until it’s near the frost-free date, then plant your summer beauties in a free-draining seed-starting medium like Pro-Mix. Water well, then set the pots (or for small bulbs, plug flats) where they will be warm but not hot, 60º to 65ºF. Add water only as necessary to keep the soil barely moist, and do not fertilize.

It should take a couple of weeks before sprouts show above the soil and start needing light, by which time the weather should be warmer. Set the plots outside in a sheltered spot where they will get plenty of sun but be protected from cold winds, and be prepared to move them indoors if the temperature threatens to go below 55ºF. Once you’re sure the weather has settled in a warm direction, transplant into the garden.

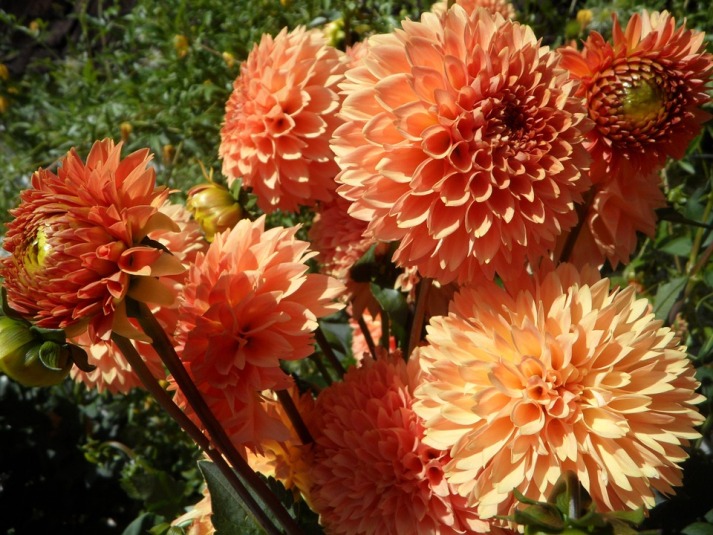
Keep your Dahlias

dahlia-173799_960_720Dahlias will not winter over in places where the ground freezes, but they are easy to store if you have a cool place to keep them. Start by making labels while the plants are still blooming, so you remember which color is which. Wait until frost kills the top growth, then as soon as there is a dry day, cut off the dead foliage leaving stubs 2 inches long. Use a digging fork to lift the tubers; turn the clumps upside down.

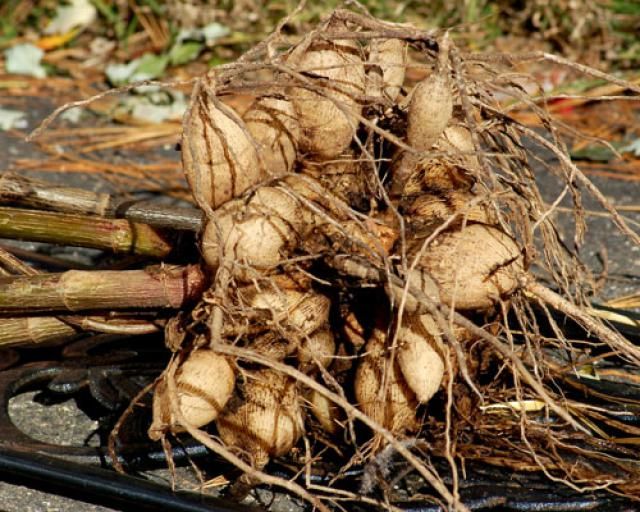
Let the tubers dry a few hours, then gently remove as much soil as possible. Don’t wash them off, as the last thin layer of clinging soil will help protect them from shriveling. Line a large box with a plastic bag; then add a 4-inch layer of coconut fiber, dry shredded leaves, styrofoam packing peanuts, or sawdust. Place tubers stem side up on this bed, keeping them well separated. Nestle the labels into the clumps.

Completely surround the tubers with additional packing material, and loosely close the bag. Store in a dark place, ideally at 35º to 45ºF. When storage temperatures climb to the mid 50s, the tubers will start sprouting. Ignore short sprouts; they’ll be buried when you plant. Clumps that come from storage with long, pale stems, however, should be hardened off before being set out into the garden.

Dahlia tubers

Dahlia tubers

In the spring, as long as there are a couple of healthy-looking eyes (the buds from which the plants grow, located up near the old stem), even rather shriveled tubers will make decent-size plants. If shoots have started to grow, evaluate them before planting. If they are still small (less that 2 inches long), just bury the tubers as you would normally, a couple of inches below the soil.

If the shoots are long and pale, they will be too far along to bury completely; they’ll also be brittle and vulnerable to sunscald, so handle carefully. Toughen up the shoots by putting the tubers with their new growth in the shade for a week or so before planting. Plant the tubers at the normal depth, with the long shoots above ground, and continue to protect the shoots with a light sprinkling of straw for the next week or 10 days. The idea is simply to shade the bleached growth until it turns green, so don’t smother it with a heavy layer of mulch.

Keep your Caladiums

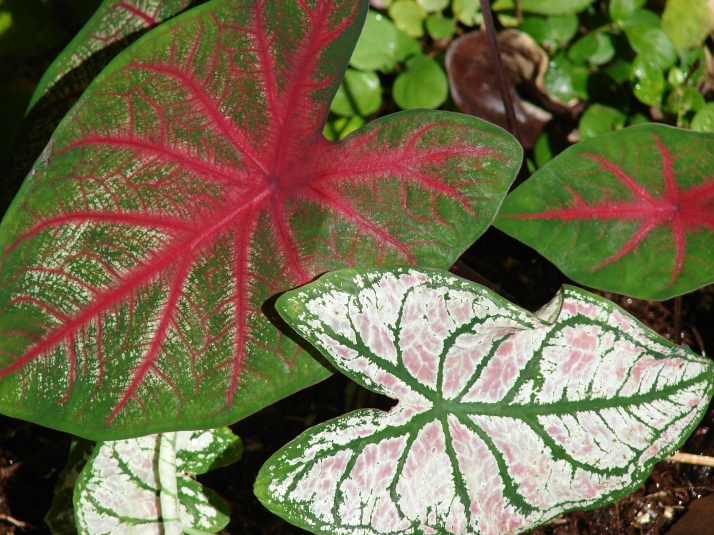
Starr_071024-9740_Caladium_bicolorAre your caladiums so beautiful this year that you can’t face the thought of getting rid of them when the summer is over? Why not try to keep them until next summer?! They can be left in the garden into fall so that the leaves can continue working and the tuber can continue to grow larger. However, once frost is in the forecast, don’t wait — just dig, taking up the whole plants or only the tubers.

To winter over a caladium, put the tuber into storage immediately or pot up the whole plant and place it in a brightly lighted windowsill. By late January, the caladium is going to look tired and will need to rest before the tuber is repotted in the spring or planted in the garden after the soil has warmed up. Chop off the foliage, knock off the soil, and let the tuber dry at room temperature. Any condensation will encourage bacterial rot. Store the tuber in dry vermiculite or in a mesh bag (like an onion bag) in a dry place, ideally at 70º to 75ºF but never below 50º, making sure there is good air circulation. Remember: it needs to be stored dry!!

Caladium is an extraordinary foliage plant. Its leaves can be white with narrow green borders or combinations of white, green, and rosy pinks, in pale to outrageous patterns that approach a third grader’s first attempt at stained glass. Most caladiums are hybrids of Caladium bicolor or C. picturatum, native to the tropics of the Americas and the West Indies. Plants can be costly, but tubers are inexpensive so you can just say goodbye at frost time if you like.