[ Titleblock ] [ Tutorial ] [ Get a Property ][ Get a Floor Plan ][ Draw a Floor Plan ][ Elevations ] [ Plot Plan ] [ Kitchen ] [ Model ] [ Section ] [ Paper-Space ]
Presenting Yourself Professionally
The Purpose…
ALL drawings use a titleblock. This borders your drawing, and puts your name on it. Everything you do is automatically covered by Canadian Copyright Law, but you NEED to have your name on it.
In this activity you will be constructing your own custom titleblock and drawing settings to be use on ALL your drawings.
The Procedure…
Click the WINDOWS button at the bottom of your screen, and type AUTOCAD to run the program.
If you are on the SCHOOL computer, make sure you pick AutoCAD 20XX English – we have a number of different versions of AutoCAD installed there.
FOLLOW EVERY INSTRUCTION BELOW
SKIP NO INSTRUCTION
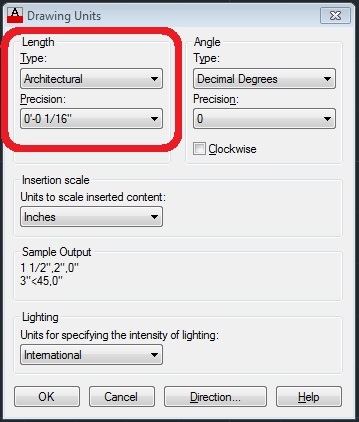
Type “UNITS” and change the settings as shown
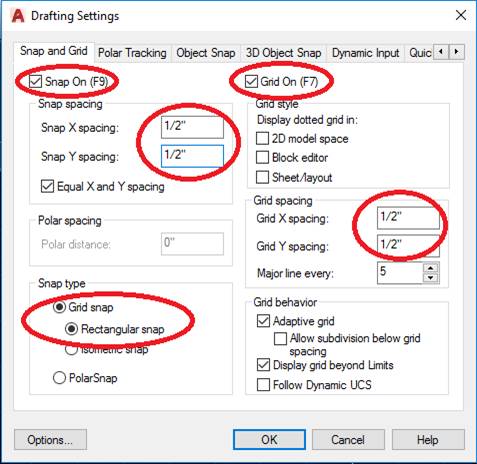
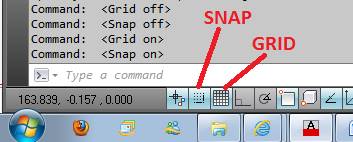
RIGHT-CLICK on the “SNAP” icon at the bottom left of your screen, and click “SETTINGS”.
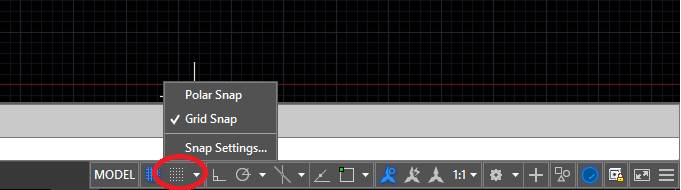
Change the settings as shown:
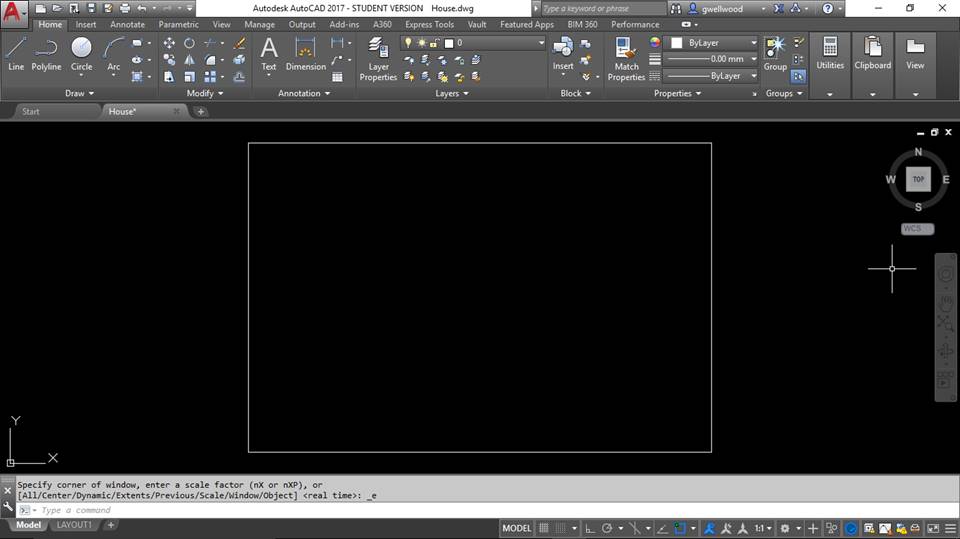
Reset the view by ZOOMing ALL
(Here are 4 different ways to do the same thing:)
-
- Double click the wheel of the mouse
- From the menu bar at the top: VIEW -> Navigate 2D -> ALL
- Type ZOOM then ALL
- Type Z then A
Note this section of the screen that has screen navigation options:
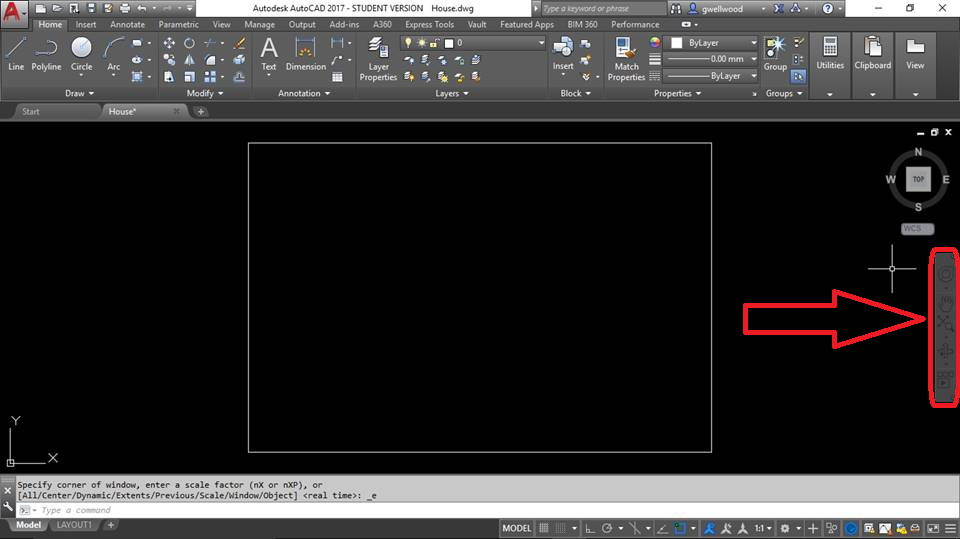
NOTE!
DO NOT USE THE CUBE IN THE TOP RIGHT TO GO 3D
DO NOT USE THE MOUSE TO GO 3D
IT WILL KICK YOUR BUM BUM LATER!!
The next step is to establish LAYERS
Type LA
LAYERS are VITAL to drawing in CAD. It’s like a stack of transparencies with different pictures on it. Stacked together, you get the whole thing, but you can “turn off” the visibility of different layers – The Plumbers don’t care about the Electricians, who don’t care about the Roofers, kind of thing.
Right click on the right side pane to create a NEW LAYER
Set up your LAYERS as shown below, with the same COLORS and LINETYPES. Make sure the “0” layer is ACTIVE
You MUST MUST MUST draw the titleblock on the “0” layer. If you don’t, things will screw up when you go to insert it into your drawing!
^^^ READ THAT AGAIN ^^^
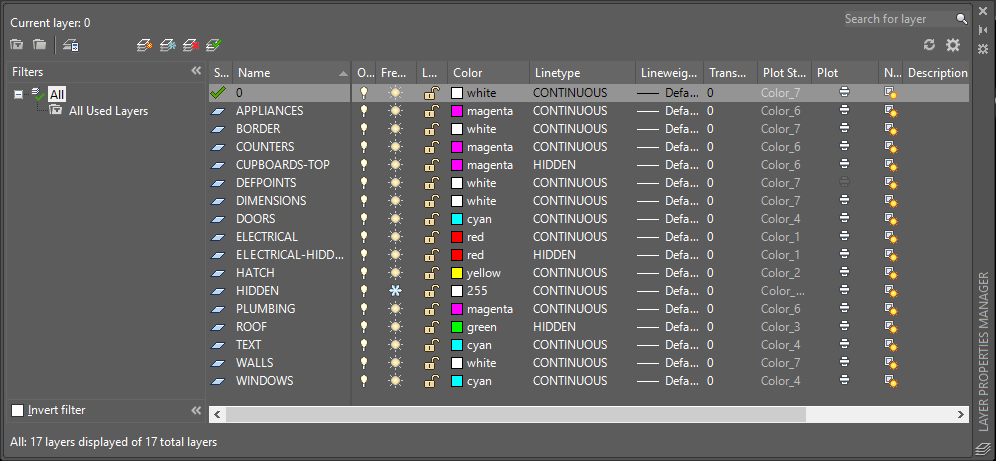
DO NOT pick the colour “white” by NUMBER (255), pick it by NAME (White). “255” prints in white, which saves printer ink, but is hard to see. BONUS POINTS IF YOU SHOW THIS TO ME
“HIDDEN” layer is coloured “255“, which is WHITE – so it will PRINT IN WHITE, and thus be INVISIBLE when printed. We will use these lines to find WALL CENTERS for Dimensioning. THE DOCTOR SAYS MY NOSE WOULDN’T BLEED SO MUCH IF I KEPT MY FINGER OUT OF THERE
Now it is time to draw the cut-line for an ARCH D size drawing In our drawings, we will PICK the layers we need to draw on.
Go to FILE pull-down, then SAVE AS – “TITLEBLOCK.DWG“ (Save often because stuff goes wrong).
CRAZY INSTRUCTION: DRAW EVERYTHING ON THE “0” LAYER (TRUST ME)
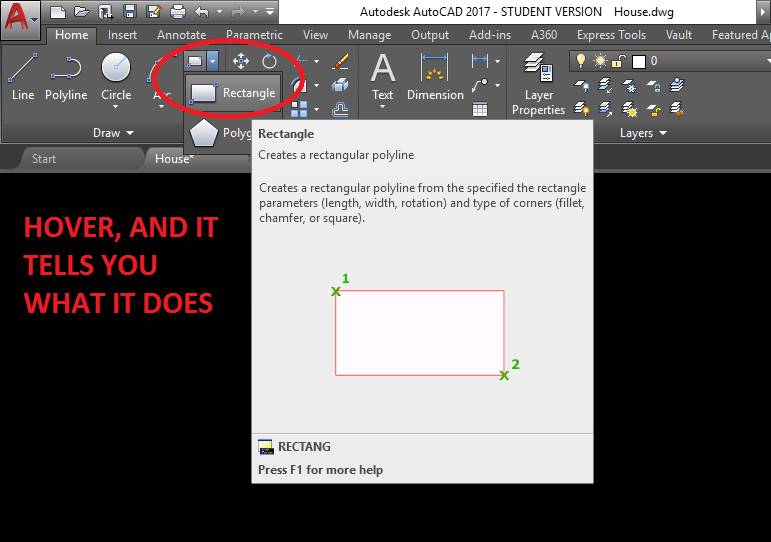
SETTING THE OUTSIDE BORDER
From the DRAW PANEL of the RIBBON MENU, pick RECTANGLE, but don’t click anywhere yet.
Instead of clicking on screen to start, type 0,0 (no spaces) to use the x,y origin as the Start Point for the Rectangle. Then type 36″,24″ for the end point of the Rectangle (see below):
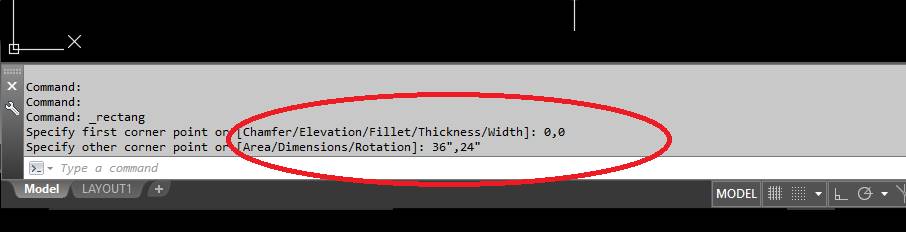
DOUBLE-CLICK THE WHEEL OF THE MOUSE TO LOOK BACK AND SEE IF YOU JUST MADE A LARGE RECTANGLE
It should look like this:
Try the toggle keys (double click) SNAP, GRID and ORTHO to see what they do
Draw EVERYTHING on the “0” layer – just trust me on this.
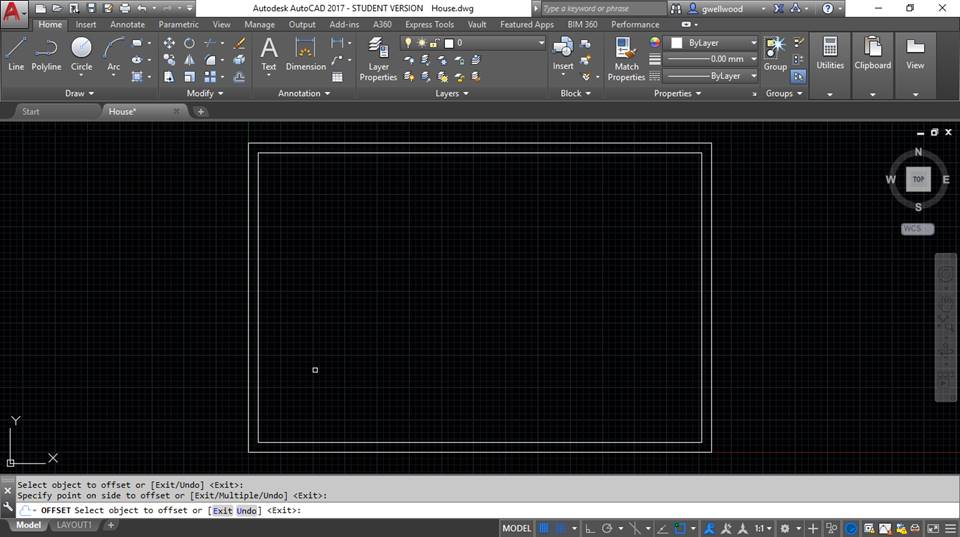
Type OFFSET (or just “O”), and then type “1” and hit ENTER or SPACEBAR (they mean the same thing in AutoCAD)
OFFSET “offsets” and existing line with another line, a specified distance away.
Click on the rectangle you drew, and then hover on either side of the line – you should see a “new” rectangle either inside, or outside what you drew. Click INSIDE. You should have this (the wee square is my cursor, don’t worry about it):
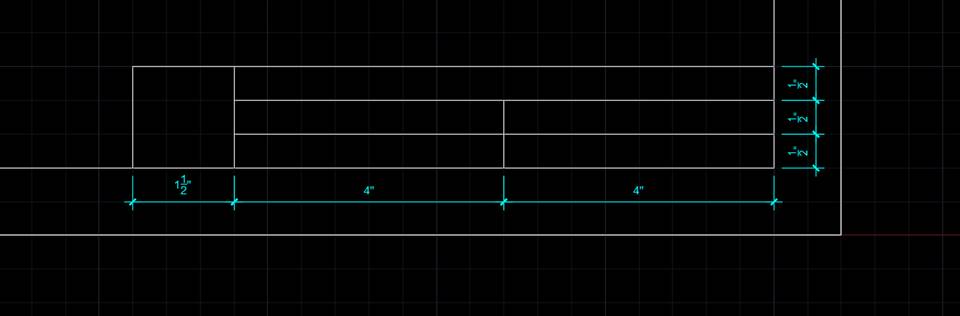
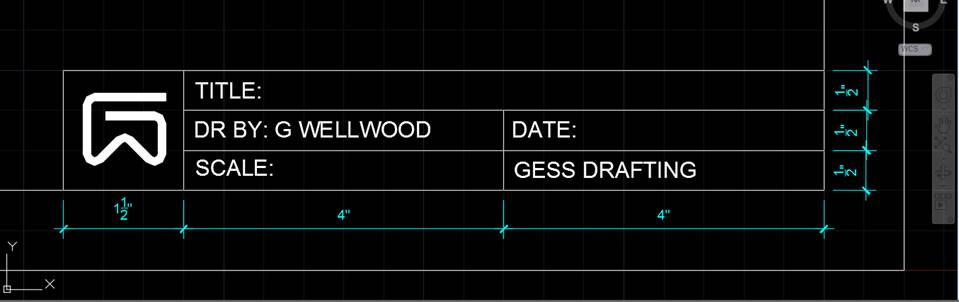
We’re going to create a text area with lines where we can put information as follows
With the SNAP and GRID on (see the Status Area) the cursor will snap every 0.5″ – AutoCAD will show you how far you have drawn (nice feature!)
Add the LINES as shown below (the dimensions are there to guide you only) Start thinking of a Logo, but don’t worry about drawing it just yet (you can worry more later).
Turn SNAP OFF
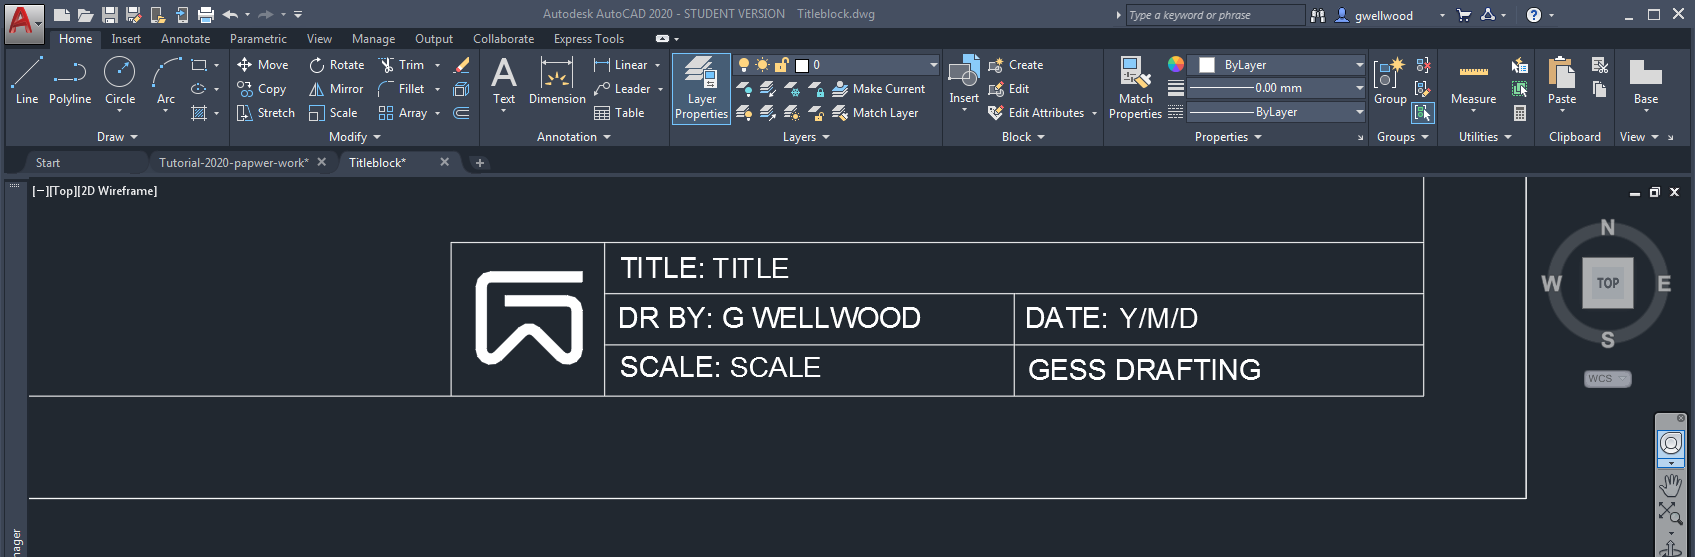
ADD TEXT TO YOUR TITLE BLOCK
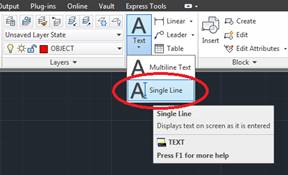
Go to the HOME TAB on the Ribbon Menu, pull-down select TEXT then SINGLE LINE TEXT (MULTILINE has issues….). Click where you want the bottom left of the text to start, and TYPE IN a text height of 3/16″
Type in the TITLES you see below (DR.BY:, TITLE:, DATE:, etc) for each section.
ALL CAPS – WE SHOUT HERE IN DRAFTING LAND

To finish text, hit enter twice (check out my cool logo!).
If you need to, MOVE (in the MODIFY menu) the text to where it needs to be so that it looks centered and well spaced.
NOTE: Text NEVER TOUCHES the titleblock lines
NOTE: The gaps and text placement must all be similar
NOTE: ALL TEXT IS IN ALL CAPS; WE SHOUT HERE
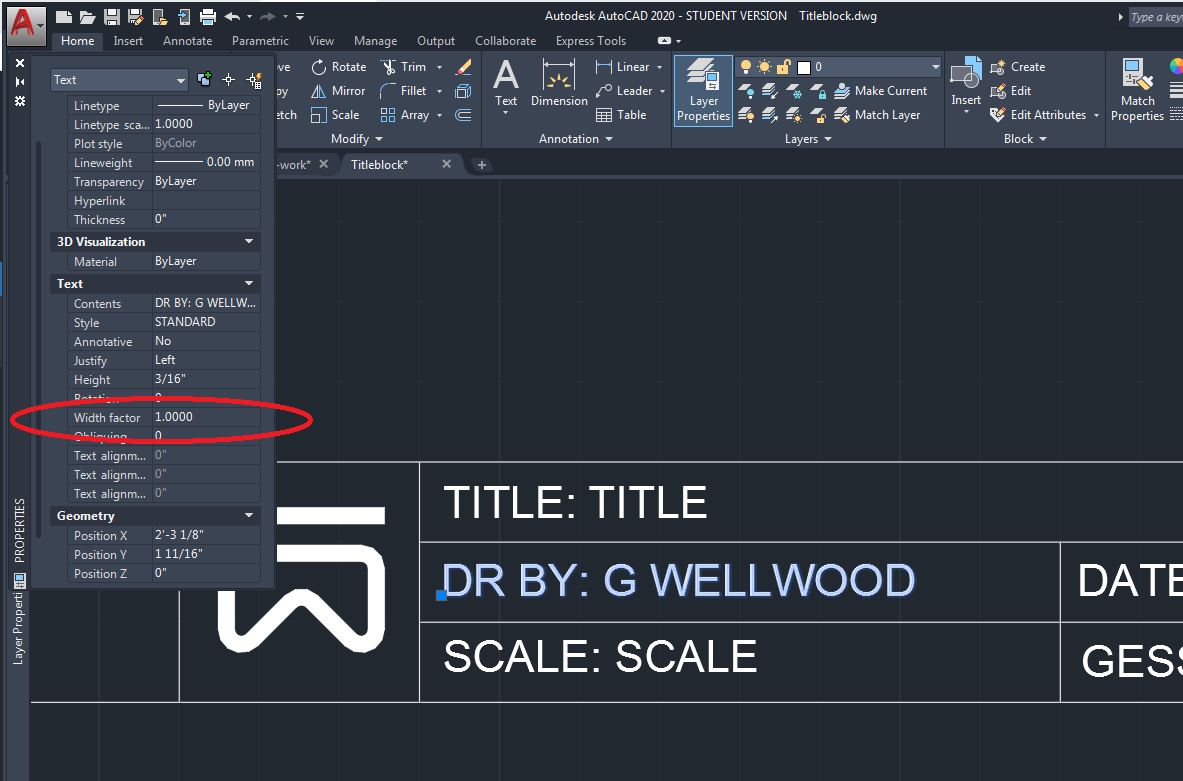
NOTE: If your name is John Jacob-Jingleheimer-Schmidt, you may need to change the “Width Factor” to make it fit the space
(See Text Properties, and change it to something like 0.7 or whatever works – change ALL text to the same width factor)
GO BACK AND READ (AND DO) the BLUE NOTES AGAIN. Make fun of your friend beside you, who did not.
You may wish to FILLET (round) the corners (see MODIFY toolbar). You don’t have to.
YOU NEED A SWEET LOGO!
Design and draw in your own logo that will identify you as a Designer, Architect, Engineer or Drafter
SIMPLE is best – AVOID complex pictures
Logos make it easy to relate to a product or organization
Refer to the phone book, magazines and other ads for examples
Try playing with your INITIALS and geometric SHAPES – avoid creating pictures
![]()
It took me SIX YEARS to come up with my logo.
I can “modify” ideas; I suck at “coming up” with ideas.
YOU AIN’T DONE YET…
AUTOMATING THE TITLEBLOCK
We will “automate” the title block so it asks for information when you insert it.
This is going to get a little weird. Just TRUST ME. Follow this, and it will work.
To do this, we add ATTRIBUTES to text, so you can automatically insert, center and set the text style of information that changes such as the drawing title, date, assignment number and scale. This is SUPER cool, and VERY convenient!
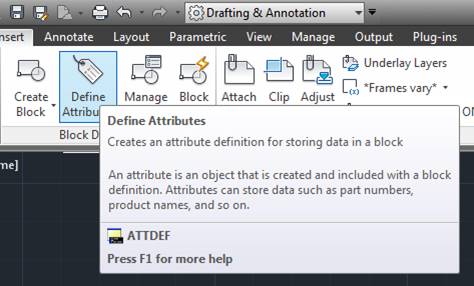
With your TITLEBLOCK.DWG drawing open… From the INSERT tab, select BLOCK DEFINITION, then DEFINE ATTRIBUTES
Check the VERIFY mode and type in the NAME, PROMPT and DEFAULT TEXT information as shown. These TAGS are the PLACEHOLDERS for the automated text:
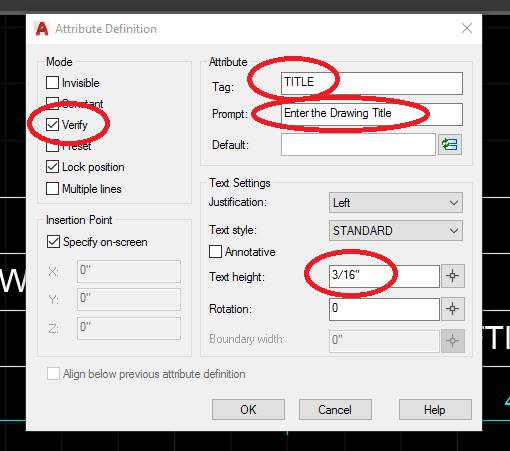
Now we PLACE these TAGS. Click OK, and use the mouse to CAREFULLY DRAG “TITLE“ to exactly where you want the Automated Text to go, then click. Now hit SPACE to bring the window back and add new items as below:
You may adjust the location of the NAMES you defined so they line up in your titleblock (remember the WIDTH FACTOR earlier? You may need that here again for long text – make ALL “width factor” settings the SAME)
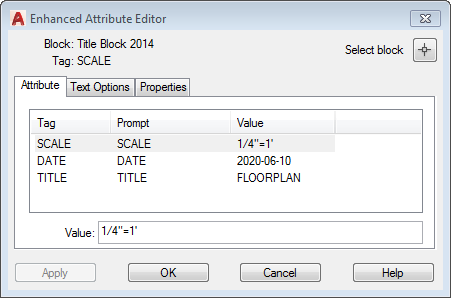
The extra “TITLE” and “SCALE” and “DATE” shown below (ie: “TITLE: TITLE”) are merely LOCATORS for the AUTOMATED TEXT ENTRY you just created. This will look weird, it’s normal.
If the TEXT TAGS are a different height (it shouldn’t be, but it might be), go into the text properties and play with different heights until they look the same

Inserting your titleblock once you have a drawing:
MODEL SPACE, PAPER SPACE, AND PLOTTING FROM AUTOCAD
Because everything was drawn on the “0” layer – it will take on all the attributes of whatever layer you put it in. You DID draw on the “0” layer, right?
LAST CHECK!
Type LA and make sure you created layers.
THIS WILL BITE YOU LATER IF YOU DIDN’T!
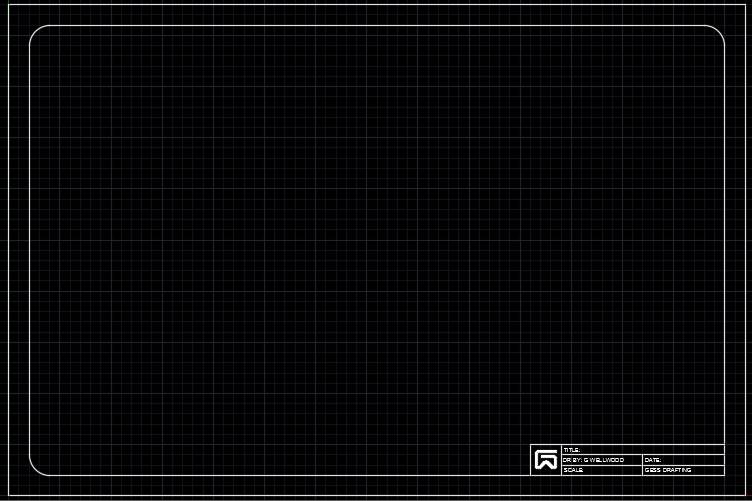
The latest evolution of my own titleblock:
