


We may receive a commission when you use our affiliate links. However, this does not impact our recommendations.
These five specialty chisels will be the perfect compliment to your bench chisels.
The amount of woodworkers that I meet that don’t have a good set of chisels nearly floors me. With the work I do, I couldn’t survive without my sharp set of bench chisels. Between fine-tuning joints, paring waste, and cleaning up problem areas, they may just be the most used tools in my shop. However, there are certain tasks that my standard bench chisels just don’t cut it (pun intended). In these instances, I’ll often reach for a set of specialty chisels that I keep on hand. Over the next pages, I want to show you some of my specialty chisels that help get you out of some sticky situations.
 Framing Chisel
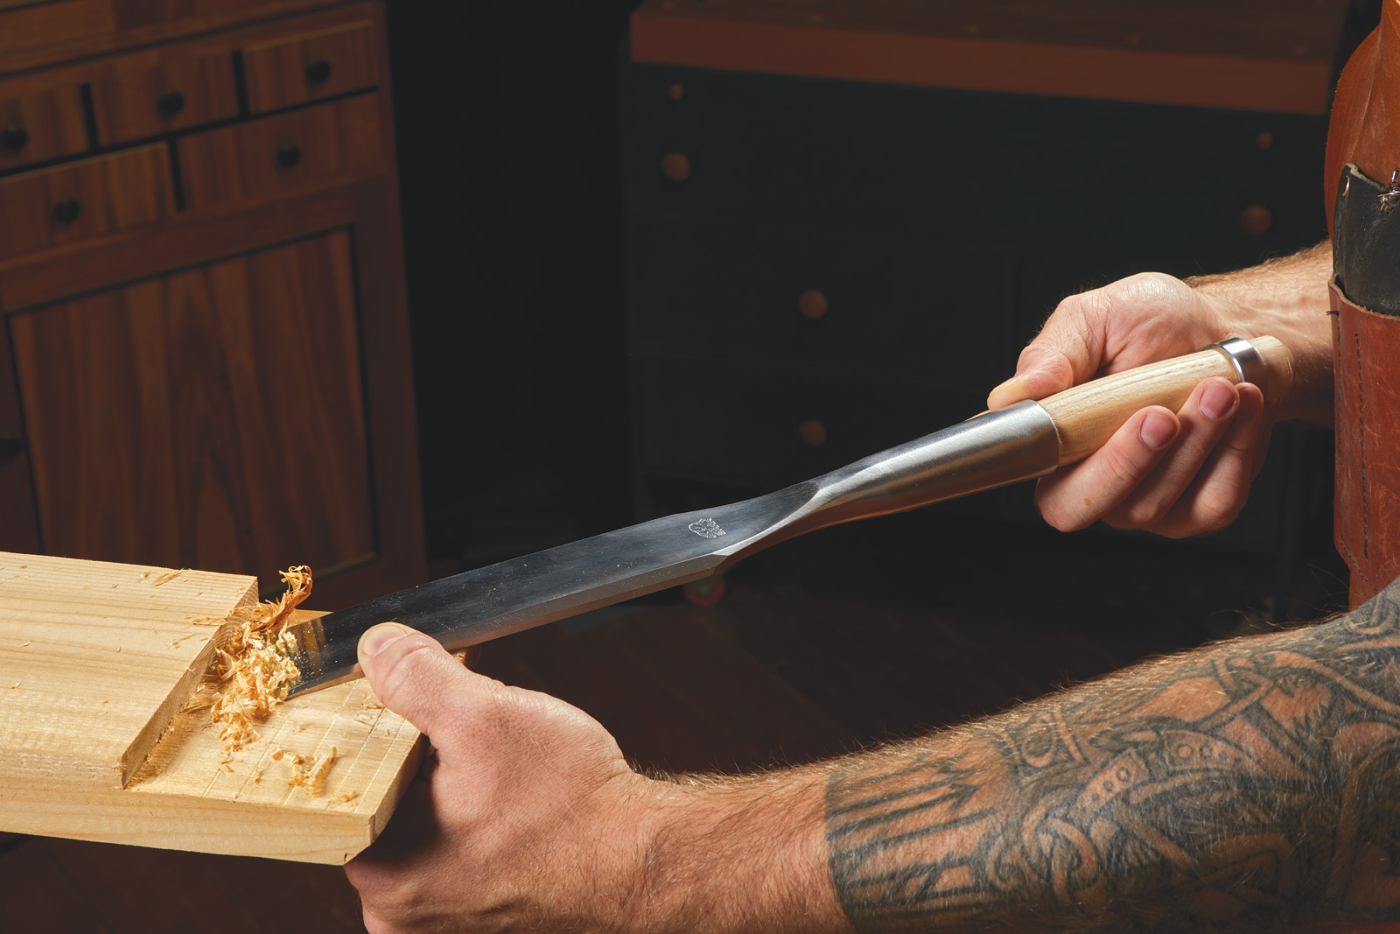
This first chisel that is in my specialty drawer is a large, 11/2“ framing chisel. This wide, razor-sharp chisel is just what the doctor ordered when it comes to large paring tasks or taking a beating when hogging out waste. This particular chisel is made by Barr Quarton and, while an investment, a worthwhile one.
Barr Framing Chisel – $164 barrtools.com
The benefit of a framing chisel, compared to a bench chisel, is that they have extra weight, length, and mass. This makes them perfect for heavy chopping
tasks,working with large timbers (such as the timber frame pieces above), and when making large paring cuts where the wide, long back of the chisel serves as a reference point.
My large framing chisel may not be an everyday tool in my shop, but when I need the wide cutting edge, mass, and a razor-sharp edge, it’s hard to beat.
 Paring Chisel
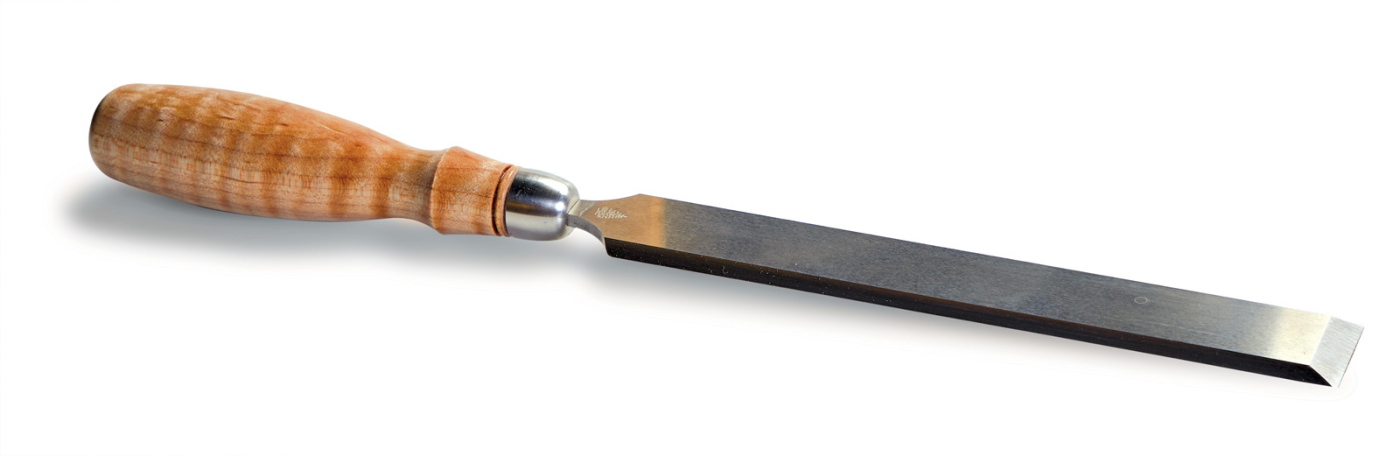
If my bench chisels are my most used tool in my shop, this next chisel is the second most used. That’s my paring chisel. This wider, 1“ blade is lightweight and is a paring machine (oddly enough). There are a couple of features of this chisel that make it adept for such a task.
The first, is the blade is long and thin. This thinness makes it feel nearly flexible. And, if you pick up a high-quality chisel, such as the Optima paring chisel from Blue Spruce (as seen here), the back will be ground and polished completely flat. This means that the back will feel as though it almost suctions down to the reference surface as you are paring.
Another feature that lends itself to this type of chisel is the low bevel angle. While most of my chisels are ground around 25-30°, my paring chisel is ground much lower. I didn’t actually measure it, but it’s probably in the 17-20° range. This lower bevel angle allows it to have a much keener edge and slice and pare grain more efficiently than a standard bench chisel. This does come with a drawback, however. A paring chisel is meant only for hand-guided work— never with a mallet.
Paring Chisel – $115 bluesprucetoolworks.com
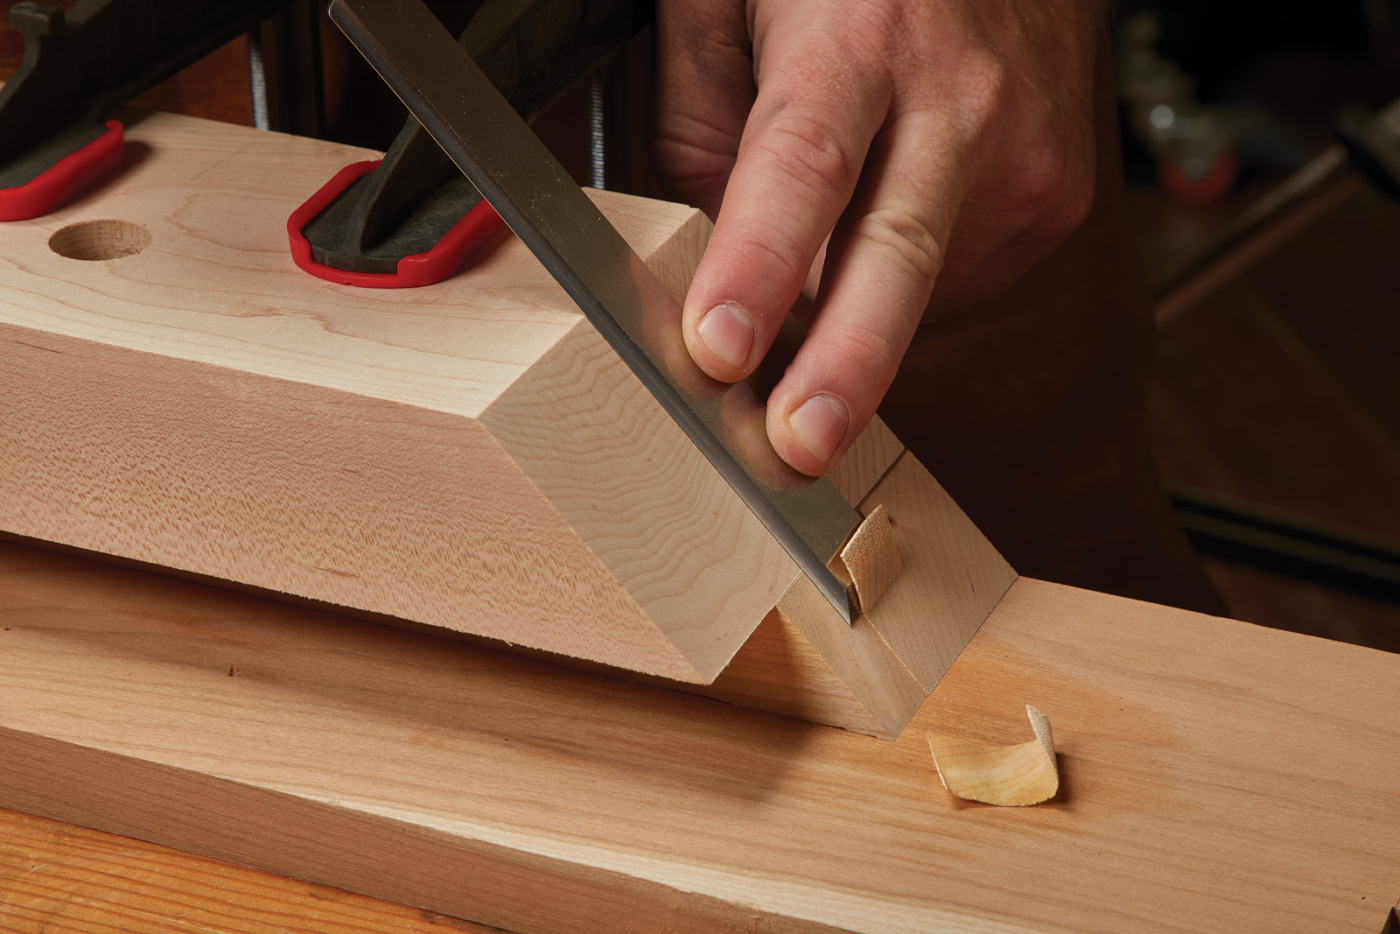
So, how do I use a paring chisel in my shop? Well, one of the most common ways is with the use of a guide block, as you see above. I’ve found that an accurately made guide block (usually made of hard maple) serves as a great reference for the long blade of the chisel. With a reference block and a sharp paring chisel, you’ll be amazed at how accurately you can pare miters on the ends of workpieces. Really, any time that you need to pare end grain, the paring chisel is worth its weight in gold.
When looking for a paring chisel, look for a flat back, a long blade (7-10“ or so), and a comfortable handle. Some vintage styles that I’ve found have a crane (or swan) neck handle on them. While I could see these occasionally being useful if you were paring in the middle of a panel, I’ve never found the need to pull one of them out of my pile and sharpen them up. For my money, however, you can’t beat the Optima paring chisel from Blue Spruce. Then again, I’m a Blue Spruce fanboy, so take that for what it’s worth. Whatever you do, do yourself a favor and pick up a paring chisel. I’ve found a 1“-wide chisel to be a great size, but I could be convinced that a 3/4” size would be just as valuable and be able to get into dadoes and grooves.
 Skew Chisel
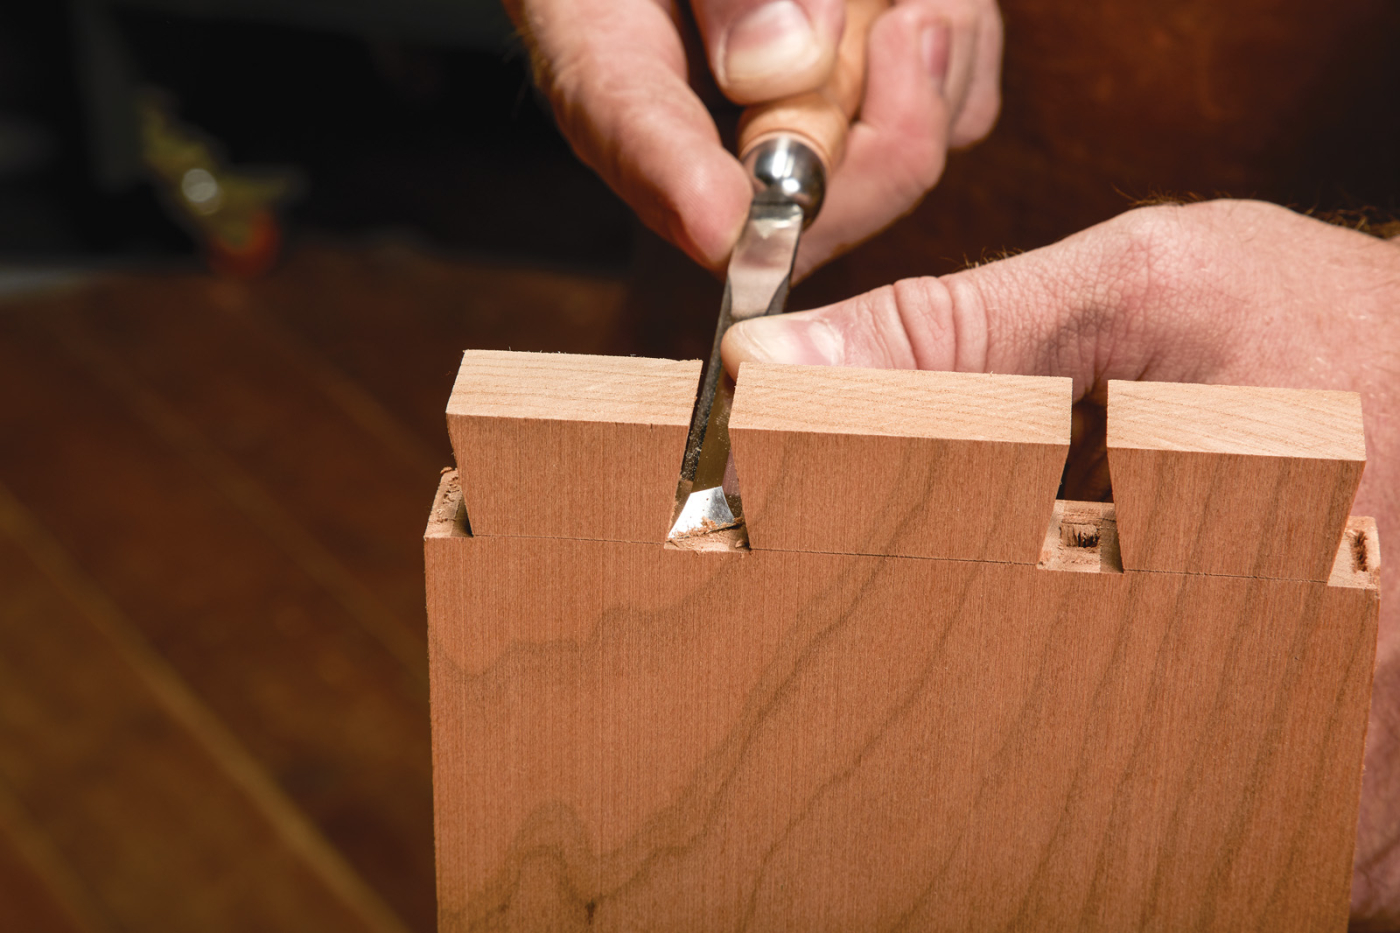
This next chisel is actually a pair of chisels. And those are skew chisels. Not to be confused with skew chisels for turning, these are sneaky little buggers that provide some interesting benefits.
Skew chisels, such as these, function like a standard bench chisel, except with a little extra reach into corners. This can be particularly helpful while you’re nipping away at a tight corner, such as the inside of a dovetail like you see here. Really, any time that you’re trying to accurately reach into a tight corner, joint, or any other area that a standard chisel is just too big and bulky to get into.
Skew Chisel – $90 bluesprucetoolworks.com
Another benefit is that the skewed cutting edge acts like a skewed blade on a plane. That is to say that it slices grain at a shear angle. This leaves a much cleaner cut, especially when dealing with figured wood, timbers prone to chip out, or end grain. Of course, the chisel does need to be sharp to perform well (who would have thought?). Getting a skew chisel sharp can be a daunting task for some woodworkers due to the angle of the bevel.
If you free-hand sharpen, a skew chisel shouldn’t be too crazy. The tip of the skew is about 30°, so you will just need to ride the bevel with the handle cocked off to one side. If you use a honing guide, you would not be able to use a side-clamping version, such as the older Ellipse style (or more modern side clamps as well). Instead, you will want to use a top-clamping guide such as the Veritas MKII. The very same reason that I dislike that guide is what makes it work well for a skew chisel—the chisel (or plane iron) can easily be rotated out of square, so you end up sharpening an unintended angle at the end of your tool. Obviously, this works well for a skew chisel.
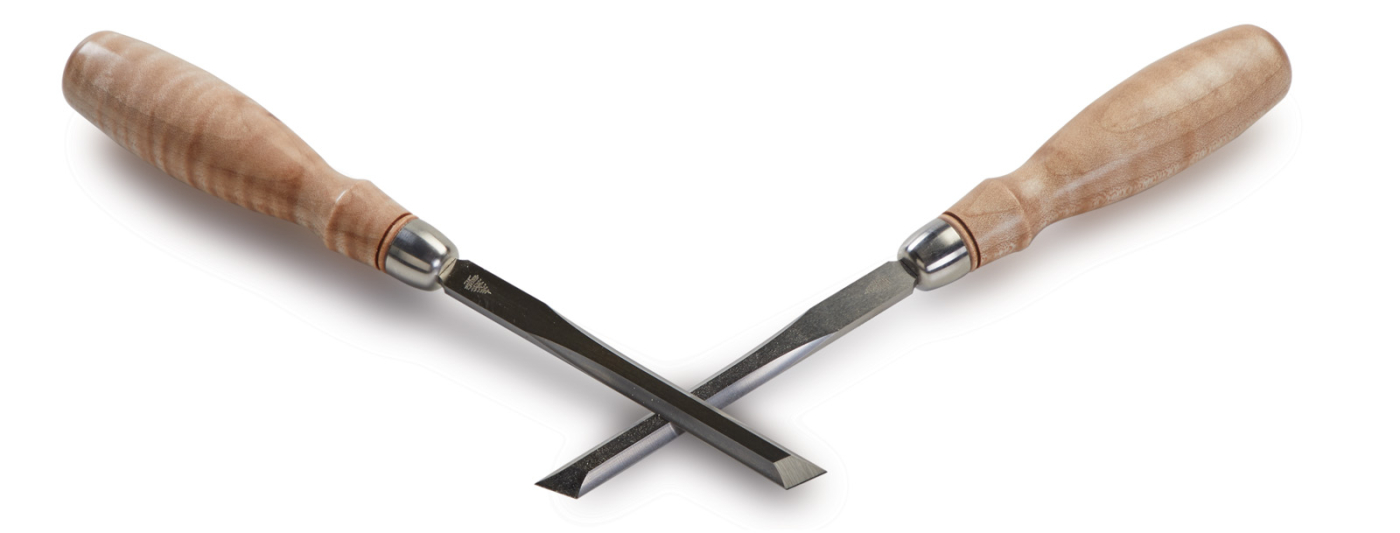
Like the paring chisel before, skew chisels are only really meant to be used with hand pressure. These chisels are often available in left-hand and right-hand skews, such as the two from Blue Spruce above. I like my tools to match, so I grabbed the Blue Spruce set. However, if you want to try one out before you invest in one, it’s easy enough to grind an angle on the end of an old, unused chisel. Shape the angle and bevel at the bench grinder—just watch the thin tip, as it can quickly overheat. Final sharpening can be done with whatever method you wish. My Blue Spruce skews are 3/8“, but if I were to order them again, I’d opt for the 1/4“ set, as I feel like the smaller size would work better for narrow dovetails. When you’re working in tight corners, skews are surely a handy little chisel to have in the toolbox.
 Fishtail Chisel
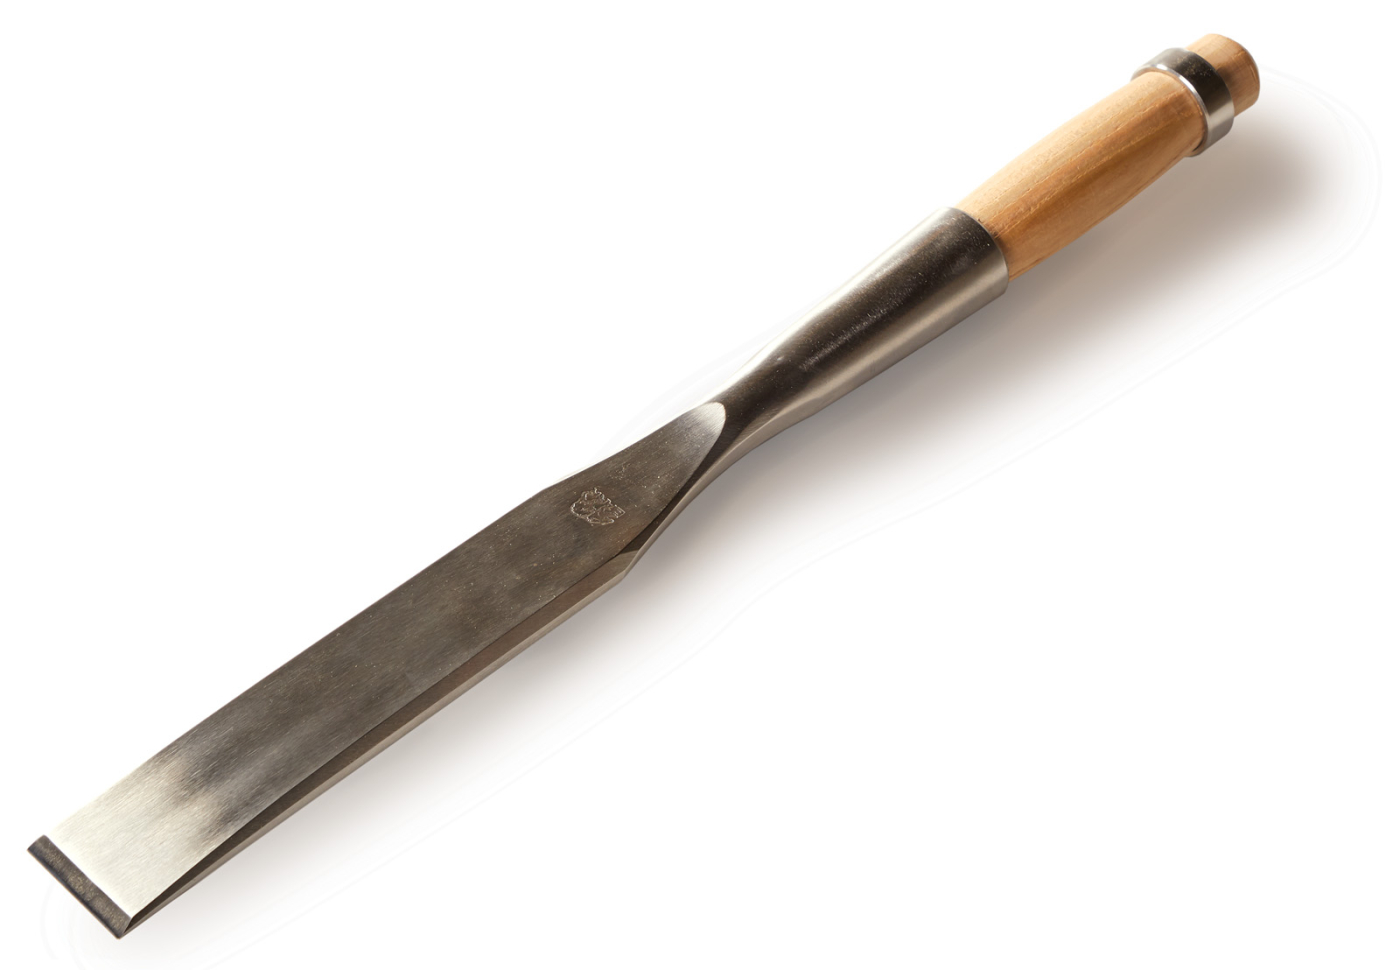
I’m going to eat some of my words here for a minute. I’ve always said how I do not like one-trick ponies in my shop. Like my kitchen, everything in my shop needs to have more than one use, or it doesn’t earn its place. The fishtail chisel is (for me) a one-trick pony that I absolutely adore when I’m doing half-blind dovetails.
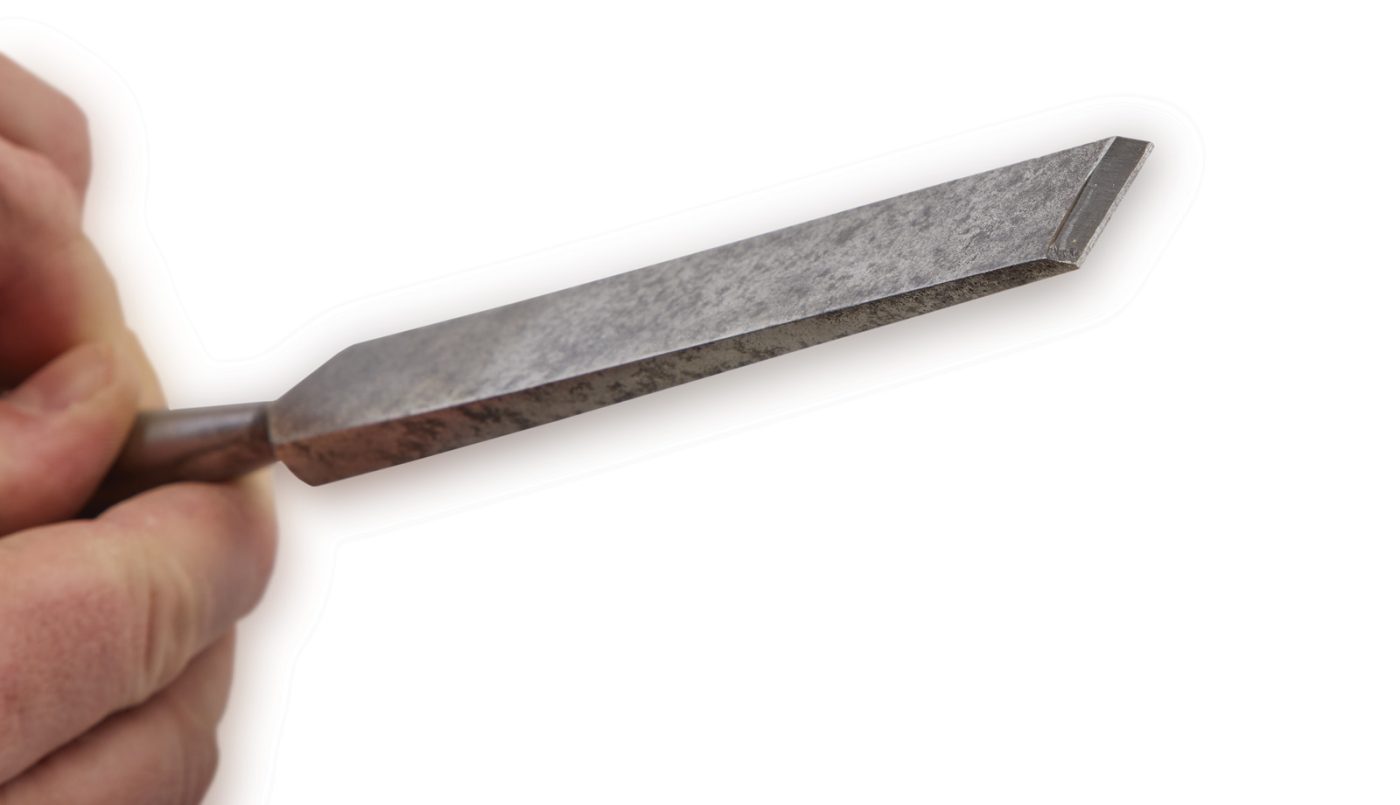
As you can see from the photo to the left, the fishtail chisel gets its name from the shape of the cutting edge. The chisel blade is narrow and flairs out as it gets to the bevel. This fishtail shape is one of the easiest and most efficient ways to clean out the inside of half-blind dovetail sockets, as you see below. Without a fishtail shape, I’ve been in there with my tiniest chisels, utility knives, and really anything I could to clean out the remaining waste in the corners of the sockets. At the end of the day, I usually end up heavily beveling the back of the tails, so if my socket wasn’t clean, I could still get the joint together.

Fishtail Chisel – $90 bluesprucetoolworks.com
Once I added a fishtail chisel, my world was rocked. All of a sudden, I could easily follow the edge of the socket with the chisel and reach right into the corners. If you don’t do half-blind dovetails, you may not see the need for a fishtail chisel. However, if it looks interesting, you can also grind an old chisel into a fishtail.
If you decide to try and grind one, my biggest piece of advice would be not to try and make the blade narrow the entire length like my Blue Spruce. Instead, concentrate on the area right around the bevel. All you need is a small neck before the bevel—it only needs to be narrow for about an inch or so. Like the previous chisels, hand pressure only on this guy. No mallet use on the fishtail—this dainty chisel isn’t meant for that.
 Blunted Chisel
Up until now, you’ve seen several of my nice chisels. I like good-looking tools. Sue me. However, this final chisel is a dirt-cheap, bargain bin chisel that gets a boat-load of use in my shop. And that’s a blunted chisel.
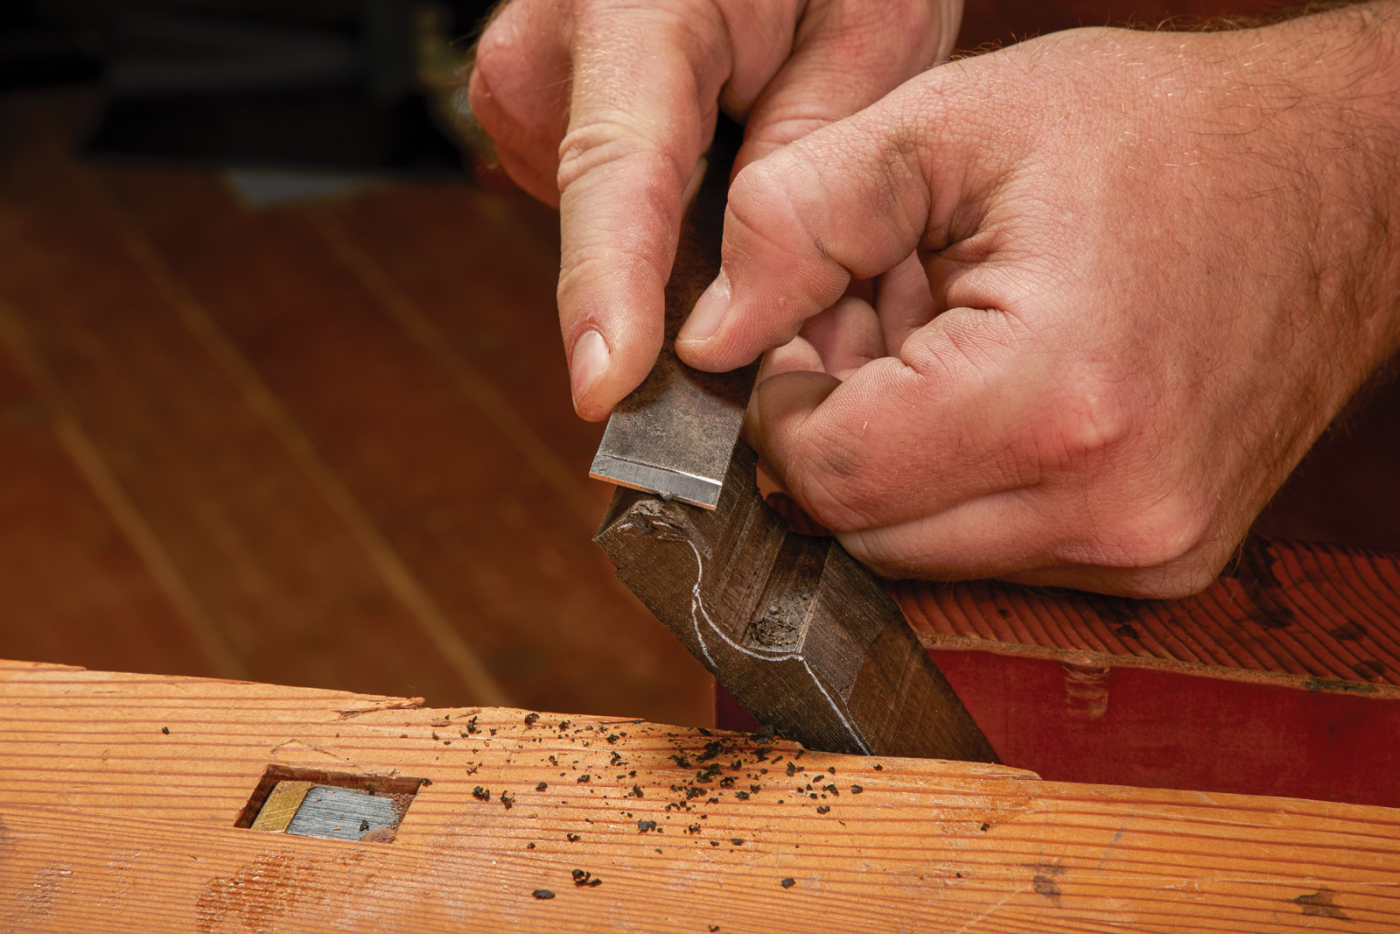
Now, I want to give a little back story here. One of my favorite plane makers, Bill Carter, is the driving force behind this chisel (and, being English, his term is “blunted” instead of “dull”). I first saw Bill use a blunted chisel in one of his videos several years back, and I knew I had to give it a go. Here’s the concept:
 Any old chisel (I use a vintage Wetherby chisel) works for this. You simply take the chisel to the bench grinder and set your platform at 90°. Then, you blunt the tip ever so slightly (with the bevel face down). You’re looking for about a 1/16“ dull edge that is 90° to the back of the chisel. That’s it. All of a sudden, you’ve made a chisel that acts like
a scraper.
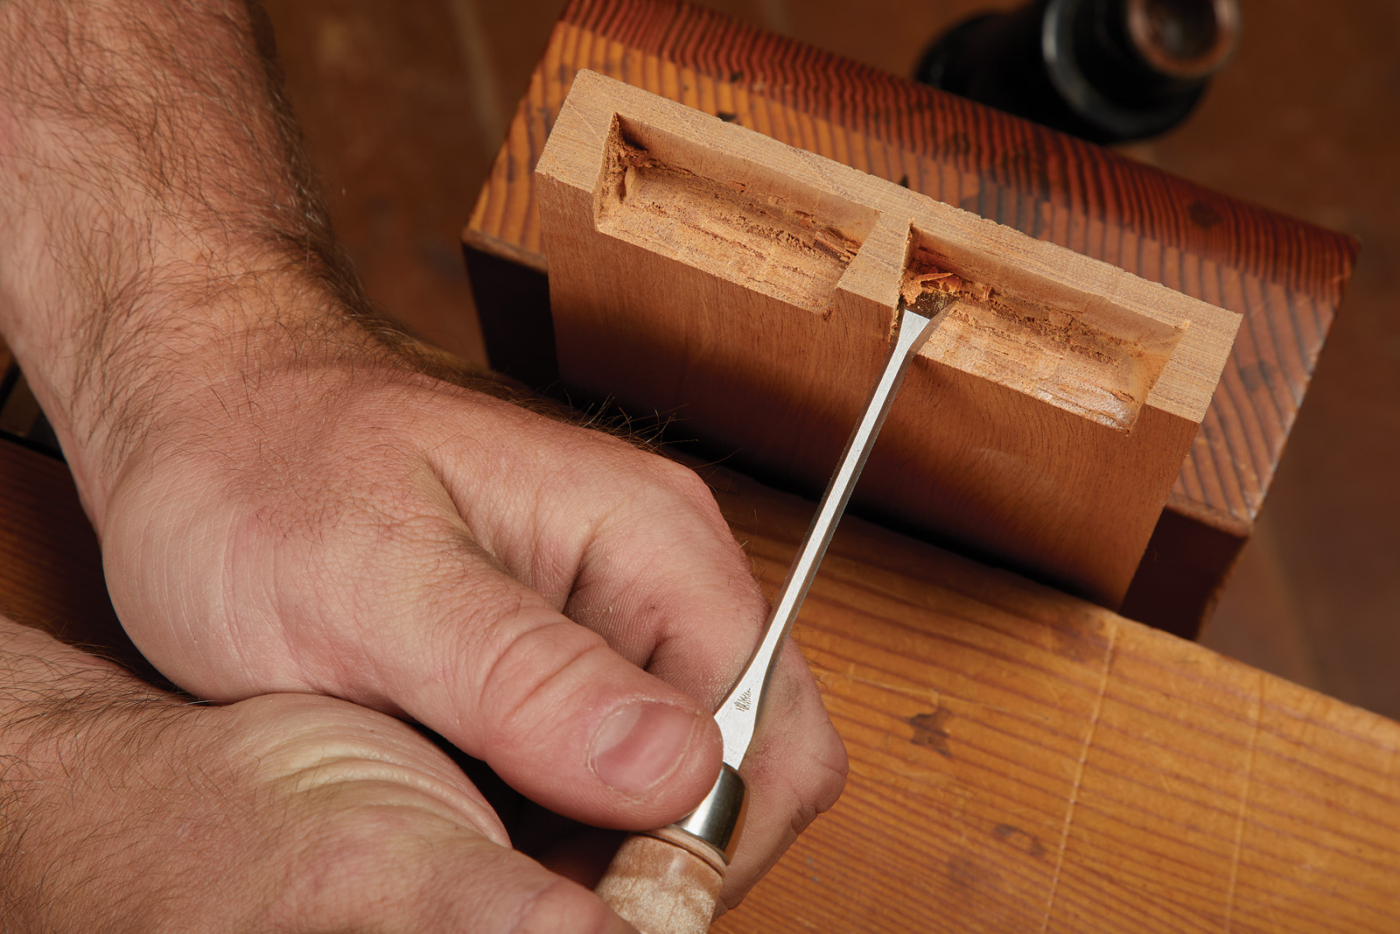
Bill totes this chisel for being used on hard, dense timbers. As you see in the photo above, I use this when making wedges for hand planes—here, I’m using it to scrape across the end grain of some Gabon ebony. The chisel only produces small curly shavings. It’s not a large waste removal tool. However, it leaves a beautiful surface. The harder the timber, the better the surface it leaves. In fact, I’ve actually used this to scrape at some of the bronze and brass hand planes I’ve made, and it works like a charm. Being a scraper, this is also a great way to remove any dried glue.
Now, like any tool, you will wear away the “cutting” edge. A really quick swipe across the grinding stone will quickly restore the edge. You don’t have to use this with only standard chisels either. I’ve got a whole set of gouges that I’ve blunted, and that allows me to scrape away at curved surfaces such as the swell on plane wedges or on curved work pieces. It’s a simple trick that works like a charm.
While nothing replaces a good, sharp, full set of bench chisels, these few specialty chisels can really compliment your set already in your shop. As I mentioned, apart from the paring chisel, I may not use every one of these chisels on all of my projects, but when I get to a spot where I need them, each and every one is worth its weight in gold.
Here are some supplies and tools we find essential in our everyday work around the shop. We may receive a commission from sales referred by our links; however, we have carefully selected these products for their usefulness and quality.


