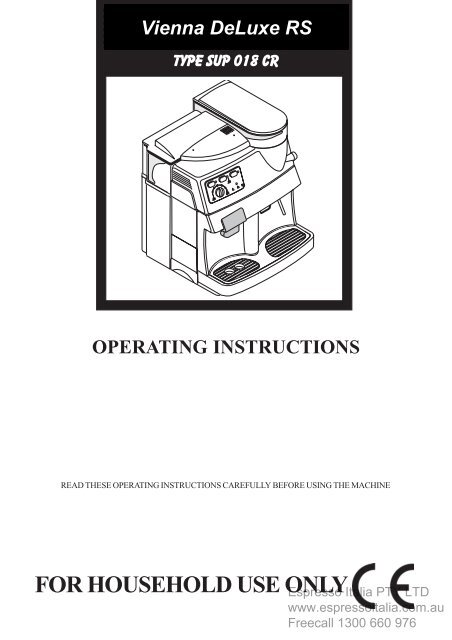
Saeco Vienna Deluxe user manual - Espresso Italia
Saeco Vienna Deluxe user manual - Espresso Italia
Saeco Vienna Deluxe user manual - Espresso Italia
Create successful ePaper yourself
Turn your PDF publications into a flip-book with our unique Google optimized e-Paper software.
TYPE sup 018 Cr<br />
OPERATING INSTRUCTIONS<br />
READ THESE OPERATING INSTRUCTIONS CAREFULLY BEFORE USING THE MACHINE<br />
FOR HOUSEHOLD USE ONLY<br />
<strong>Espresso</strong> <strong>Italia</strong> PTY LTD<br />
www.espressoitalia.com.au<br />
Freecall 1300 660 976
Congratulations!<br />
Congratulations on choosing this top-quality espresso machine and many thanks for your confidence<br />
in our products. Before operating the machine, we recommend you read the following instructions<br />
thoroughly which explain how to use, clean and maintain the machine. For any other information,<br />
please contact the retailer or our company directly. We will be glad to provide you with any<br />
explanations you may need.<br />
<strong>Espresso</strong> <strong>Italia</strong> PTY LTD<br />
www.espressoitalia.com.au<br />
Freecall 1300 660 976
3<br />
12<br />
14<br />
1<br />
13<br />
2<br />
11<br />
10<br />
9<br />
3<br />
8<br />
4<br />
6<br />
5<br />
15 16 17 18 19 20<br />
7<br />
21<br />
22<br />
<strong>Espresso</strong> <strong>Italia</strong> PTY LTD<br />
www.espressoitalia.com.au<br />
Freecall 1300 660 976
4<br />
27 28<br />
12<br />
29<br />
30<br />
31<br />
32<br />
<strong>Espresso</strong> <strong>Italia</strong> PTY LTD<br />
www.espressoitalia.com.au<br />
Freecall 1300 660 976
5<br />
33 34<br />
35<br />
36<br />
37<br />
38<br />
<strong>Espresso</strong> <strong>Italia</strong> PTY LTD<br />
www.espressoitalia.com.au<br />
Freecall 1300 660 976
24<br />
1 GENERAL INFORMATION .................... 24<br />
2 TECHNICAL SPECIFICATIONS ............. 25<br />
3 SAFETY RULES ..................................... 27<br />
4 INSTALLATION .................................... 30<br />
5 COFFEE GRINDER ............................... 31<br />
6 DISPENSING COFFEE .......................... 31<br />
7 DISPENSING STEAM/PREPARING CAP-<br />
PUCCINO ........................................... 32<br />
8 DISPENSING HOT WATER ................... 32<br />
General information<br />
9 TURNING THE MACHINE ON AND OFF 33<br />
10 CLEANING AND MAINTENANCE ........ 33<br />
11 BREW GROUP ..................................... 33<br />
12 DESCALING ........................................ 34<br />
13 OPTIONAL ACCESSORIES ................... 34<br />
14 LEGAL INFORMATION ........................ 38<br />
15 DISPOSAL OF THE APPLIANCE ............ 38<br />
PROBLEMS CAUSES REMEDIES ................. 39<br />
Read these operating instructions carefully before using the machine<br />
1 GENERAL INFORMATION<br />
This coffee machine is ideal for preparing espresso coffee using whole coffee beans only<br />
and is provided with a device for dispensing steam and hot water.<br />
The elegantly styled machine is designed and suitable for normal home use only.<br />
Important. The manufacturer accepts no liability for damage or injury caused<br />
by:<br />
• improper use outside the defined operating parameters;<br />
• repairs carried out by anyone other than authorized service centers;<br />
• tampering with the power cable;<br />
• tampering with any component of the machine;<br />
• use of non-original spare parts and accessories.<br />
In such cases the warranty will lose all validity.<br />
1.1 To facilitate interpretation<br />
A warning triangle indicates all the instructions that are important for <strong>user</strong> safety. Follow<br />
these directions carefully to avoid serious injury!<br />
2<br />
Illustrations, parts of the machine and control functions are referred to by number or<br />
letter, e.g. illustration 2 in this paragraph.<br />
i<br />
This symbol identifies the most important information for <strong>Espresso</strong> ensuring optimal <strong>Italia</strong> use PTY of LTD the<br />
machine.<br />
www.espressoitalia.com.au<br />
Freecall 1300 660 976
Technical specifications<br />
25<br />
The illustrations corresponding to the text may be found on the inside cover flap.<br />
Keep this page open while reading the operating instructions.<br />
1.2 How to use these operating instructions<br />
Keep these operating instructions in a safe place and make them available to anyone<br />
else who should use the coffee machine.<br />
If you require any further information or meet with any problems not completely or<br />
sufficiently explained in these instructions, contact the experts.<br />
2 TECHNICAL SPECIFICATIONS<br />
Voltage rating<br />
Power rating<br />
Casing material<br />
See rating plate on machine<br />
See rating plate on machine<br />
Thermoplastic<br />
Size (w x h x d) (mm) 337 x 325 x 377<br />
Weight (Kg) 8.5<br />
Cable length (mm) 1200<br />
Control panel<br />
Water container<br />
Power supply<br />
Front<br />
Water container capacity (lt.) 1.7<br />
Coffee container capacity (gr)<br />
Removable<br />
Pump pressure (bars) 13-15<br />
Boilers<br />
Safety features<br />
See rating plate on machine<br />
350 of coffee beans<br />
2 in Aluminium<br />
Boiler pressure safety valve, 2 safety<br />
thermostats.<br />
The manufacturer reserves the right to change the machine’s specifications in line with<br />
technological progress.<br />
The machine conforms to European Directive 89/336/EEC (Legislative Decree 476 of<br />
04/12/92), regarding the elimination of radio-television interference. <strong>Espresso</strong> <strong>Italia</strong> PTY LTD<br />
www.espressoitalia.com.au<br />
Freecall 1300 660 976
26<br />
Safety rules<br />
A<br />
B<br />
C<br />
D<br />
E<br />
<br />
sizes in millimeter<br />
<strong>Espresso</strong> <strong>Italia</strong> PTY LTD<br />
www.espressoitalia.com.au<br />
Freecall 1300 660 976
Safety rules<br />
3 SAFETY RULES<br />
Never place electrical parts in contact<br />
with water: danger of short circuit! The<br />
superheated steam and hot water may<br />
cause scalding! Never aim the steam<br />
or hot water flow towards parts of your<br />
body, use caution when touching the<br />
steam / hot water nozzle: danger of<br />
scalding!<br />
Intended use<br />
The coffee machine is designed for home<br />
use only.<br />
To avoid risks, do not make any technical<br />
changes or use the machine for purposes<br />
other than those stated!<br />
The machine must not be used by children.<br />
Power supply<br />
Plug the coffee machine into a suitable<br />
electrical outlet.<br />
The voltage must correspond to the value<br />
indicated on the rating plate.<br />
A Power cable<br />
Never use the coffee machine if the power<br />
cable is defective.<br />
You should have any defective cables or<br />
plugs immediately replaced by an<br />
Authorized Service Center.<br />
Do not pass the cable around corners, over<br />
sharp edges or over hot objects and keep<br />
it away from oil.<br />
Do not use the cable to carry or pull the<br />
coffee machine.<br />
Do not remove the plug by tugging on the<br />
cable or touch it with wet hands.<br />
Make sure the cable cannot drop freely<br />
from tables or shelves.<br />
B Protecting others<br />
Do not allow children to play with the coffee<br />
machine.<br />
Children are not aware of the dangers<br />
connected with household appliances.<br />
27<br />
C Danger of burns<br />
Avoid aiming the superheated steam and/<br />
or hot water flow at yourself and/or at<br />
others.<br />
Always use the handles or knobs provided.<br />
D Siting<br />
Place the coffee machine in a safe place<br />
where no one can tip it over or be injured<br />
by it.<br />
Do not use the coffee machine outdoors.<br />
To prevent melting or damage to the<br />
casing, do not rest the machine on very<br />
hot surfaces or near open flames.<br />
E Cleaning<br />
Before cleaning the machine, it is imperative<br />
to turn the button (15) to OFF and<br />
remove the plug from the electrical outlet.<br />
Also wait for the machine to cool down.<br />
Never immerse the machine in water!<br />
Never tamper with internal machine parts.<br />
Tampering with internal parts will void the<br />
manufacturer’s warranty.<br />
D Space for use and maintenance<br />
To ensure that the coffee machine works<br />
properly and efficiently, you are advised to:<br />
• Rest it on a perfectly level surface;<br />
• Place it in an adequately lit, hygienic site<br />
with an electrical outlet within easy reach;<br />
• Ensure a minimum clearance between<br />
the machine and the walls as shown in<br />
the figure.<br />
Storing the machine<br />
If the machine is to remain out of use for a<br />
lengthy period, turn it off and pull out the<br />
plug. Store it in a dry place out of children’s<br />
reach. Keep it away from dust and dirt.<br />
Do not expose machine to freezing<br />
temperatures. Damage to internal<br />
components will occur.<br />
Servicing / Maintenance<br />
In the event of a breakdown, fault or<br />
suspected damage <strong>Espresso</strong> after a fall, <strong>Italia</strong> immediately PTY LTD<br />
unplug the machine. www.espressoitalia.com.au<br />
Freecall 1300 660 976
28<br />
Never operate a faulty machine.<br />
Maintenance and repairs are to be carried<br />
out exclusively by Authorized Service<br />
Centers.<br />
The manufacturer will accept no liability<br />
for any damage caused by unauthorized<br />
servicing.<br />
Safety rules<br />
Fire safety<br />
In the event of fire, use carbon dioxide<br />
(CO 2<br />
) extinguishers. Do not use water or<br />
powder extinguishers.<br />
<strong>Espresso</strong> <strong>Italia</strong> PTY LTD<br />
www.espressoitalia.com.au<br />
Freecall 1300 660 976
Key to machine components / Control panel<br />
29<br />
Key to machine components<br />
1 Water container lid<br />
2 Water container<br />
3 Front door<br />
4 Dump box<br />
5 Power cable<br />
6 Height-adjustable coffee dispenser<br />
7 Brew group<br />
8 Drip tray + grill<br />
9 Steam Wand<br />
10 Control panel<br />
11 Steam knob<br />
12 Grinder adjustment knob<br />
13 Coffee bean container<br />
14 Coffee bean container lid<br />
Control panel<br />
15 Power switch Allows you to turn the machine on and off<br />
16 On/off light It lights up when you turn the machine on and goes<br />
off when you turn the machine off<br />
17 Coffee dispensing button Allows you to dispense coffee: press once to fill<br />
one coffee cup; press twice to fill two coffee cups.<br />
18 Coffee/steam Allows you to check the temperature: It flashes<br />
when the temperature is too low (machine is heating<br />
up) It stays lit when the machine is ready to dispense<br />
coffee and steam.<br />
19 Hot water selector button When the machine is turned on, it is set on standby<br />
for coffee and standby for steam. Press the button to<br />
switch to the hot water setting. Press the button again<br />
to switch the machine back to the steam setting.<br />
20 Hot water light It lights up when the machine has been switched to<br />
the hot water setting.<br />
21 Knob for regulating the It adjusts the level of the coffee in the cup; e.g.:<br />
quantity of coffee dispensed Position ( ) = espresso coffee<br />
in one cup Position ( ) = regular coffee<br />
22 Warning light Identifies machine alarms It remains lit when the coffee<br />
and/or water containers need refilling; It flashes when<br />
the dump box, brew group or drip tray have not<br />
been installed properly.<br />
<strong>Espresso</strong> <strong>Italia</strong> PTY LTD<br />
www.espressoitalia.com.au<br />
Freecall 1300 660 976
30<br />
4 INSTALLATION<br />
For your own safety and the safety of others,<br />
you must strictly comply with the “Safety<br />
Rules” described in chap.3<br />
4.1 Package<br />
The original packaging was designed and<br />
made to protect the machine during<br />
shipping.<br />
We recommend keeping it for future<br />
transport purposes.<br />
4.2 Preliminary operations<br />
• Remove the packet containing the lid,<br />
the key for the brew group unit and the<br />
cleaning brush from the packing<br />
materials.<br />
• Take the coffee machine out of its<br />
packing and position it in a suitable<br />
place conforming to the requisites<br />
described in the safety rules (chap.3.)<br />
• Fit the coffee container lid (14) onto the<br />
coffee container (13); store the brew<br />
group key and cleaning brush in a safe<br />
place.<br />
• Make sure that the tray (8) with grill, the<br />
dump box (4) and the brew group (7)<br />
are installed properly and that the front<br />
door (3) is closed.<br />
• Before plugging in the machine, make<br />
sure the button (15) is on OFF.<br />
i<br />
If the red light (22) flashes when<br />
you turn on the machine, it means<br />
that one of the above-described parts<br />
has not been correctly fitted in place.<br />
4.3 Turning on for the first time<br />
• 28 Lift out the water container (2) and<br />
remove the lid (1). Rinse it out and fill it<br />
with fresh drinking water, making sure<br />
you do overfill it. Lower the container<br />
back into place inside the machine and<br />
replace the lid.<br />
Fill the container (2) only with<br />
cool, still water. Hot water or<br />
other liquids may damage the<br />
container and/or the machine.<br />
Always make sure there is enough<br />
water inside the container before<br />
starting the machine.<br />
• 27 Take off the lid (14) and fill the<br />
container with whole coffee beans (13).<br />
• Fit the lid of the coffee container back<br />
into place.<br />
Fill the container (13) with<br />
whole coffee beans only.<br />
Ground or freeze-dried coffee or any<br />
other objects will damage the<br />
machine.<br />
• Insert the plug (5) into a suitable outlet.<br />
• The button (15) is positioned on OFF.<br />
Simply press the button (15) to turn on<br />
the machine; the green pilot light (16)<br />
will go on.<br />
4.4 Priming the machine<br />
• Position the steam tube (9) over the drip<br />
tray.<br />
• 30 Press the “hot water” selector button<br />
(19); the light (20) will go on.<br />
• Turn the knob (11) counterclockwise and<br />
wait until water flows out smoothly from<br />
the steam tube; to cut off flow, turn the<br />
knob (11) clockwise.<br />
i<br />
Installation<br />
Note: <strong>Espresso</strong> Before starting <strong>Italia</strong> up PTY for LTD the<br />
first time, or if the machine has<br />
www.espressoitalia.com.au<br />
Freecall 1300 660 976
Coffee grinder / Dispensing coffee<br />
been inoperative for a lengthy period<br />
or the water container has been<br />
completely emptied, it is advisable to<br />
prime the machine before it has time<br />
to heat up.<br />
• Once you have completed the above<br />
operations, the machine is ready for use.<br />
• Press the “hot water” selector button<br />
(19); the light (20) will go off.<br />
• When dispensing coffee or steam,<br />
carefully follow the directions below to<br />
ensure proper use of the machine.<br />
5 COFFEE GRINDER<br />
Warning! The grinder<br />
adjustment knob inside the<br />
coffee container must be turned only<br />
while the coffee grinder is operating. Do<br />
not introduce ground and/or freezedried<br />
coffee in the coffee bean container.<br />
Do not introduce any material<br />
other than coffee beans. Inside<br />
the coffee grinder there are moving<br />
parts that may be dangerous; do not<br />
place your fingers and/or other objects<br />
inside the grinder. Before performing<br />
any kind of operation inside the coffee<br />
container, switch off the machine and<br />
unplug it. Do not introduce coffee<br />
beans while the grinder is operating.<br />
i<br />
The quality and flavor of your<br />
coffee will depend not only on the<br />
blend you use but also on how finely<br />
you grind it. The machine has a knob<br />
(12) for adjusting the grind. To adjust<br />
the grind, turn the graduated knob<br />
while the grinder is operating; the<br />
numbers on the knob indicate the<br />
grind setting.<br />
Every machine is factory-regulated to<br />
a medium-sized grind; turn the knob<br />
to lower numbers to obtain a finer<br />
31<br />
grind, turn the knob to higher numbers<br />
to obtain a coarser grind.<br />
The variation in the grind setting will<br />
be noted only after three or four<br />
coffees have been dispensed.<br />
i<br />
Use blends of coffee beans for<br />
espresso machines. Avoid using<br />
extreme grinding settings (e.g. 1 or 16);<br />
in these cases use different blends of<br />
coffee. Store coffee in an airtight<br />
container in a cool, dry place.<br />
You should adjust the grind setting when<br />
the coffee is not dispensed properly:<br />
Coffee pours out too fast = excessively<br />
coarse grind > set knob on a finer grind;<br />
Coffee drips out slowly and/or not at all<br />
= excessively fine grind > set knob on<br />
coarser grind.<br />
6 DISPENSING COFFEE<br />
Before dispensing coffee, make sure the<br />
steam/hot water tube (11) is closed.<br />
• When you switch on the machine the<br />
temperature control light (18) will flash<br />
until the machine heats up to the right<br />
temperature.<br />
• Before dispensing coffee, make sure that<br />
the green temperature ready light (18)<br />
remains lit and that both the water and<br />
coffee containers are full.<br />
• When the green light remains lit (18) the<br />
machine is ready to dispense coffee.<br />
• 29 Place 1 or 2 cups beneath the<br />
dispenser nozzles (6); you may adjust the<br />
height of the dispenser to adapt it to your<br />
cups.<br />
34 The dispenser (6) may be moved so<br />
that you may use large cups. In this case<br />
you must <strong>manual</strong>ly <strong>Espresso</strong> push the <strong>Italia</strong> dispensing PTY unit LTD<br />
as high as it www.espressoitalia.com.au<br />
goes; to set the dispenser in<br />
Freecall 1300 660 976
32<br />
Dispensing steam/preparing cappuccino / Dispensing hot water<br />
the ideal position for small cups, you must<br />
move it to a lower position.<br />
• Use the knob (21) to adjust the amount<br />
of coffee in the cup.<br />
• To dispense coffee, press the button (17);<br />
the dispensing cycle will begin; press the<br />
button (17) once to dispense one cup<br />
and press it two times in succession to<br />
dispense 2 cups.<br />
• After completing the pre-brewing cycle,<br />
the coffee will start flowing out of the<br />
dispensing nozzle (6).<br />
• The machine will automatically stop<br />
dispensing coffee when it reaches the<br />
level set with the knob (21); you may<br />
however stop flow at any time by pressing<br />
the button (17).<br />
Before proceeding to dispense<br />
steam or hot water, make<br />
sure that the steam tube is positioned<br />
over the drip tray.<br />
7 DISPENSING STEAM/<br />
PREPARING CAPPUCCINO<br />
The steam may be used to froth milk for<br />
cappuccino and to heat up beverages. The<br />
machine requires no pre-heating.<br />
Danger of scalding!<br />
The steam may be preceded by<br />
brief sprays of hot water. The<br />
dispensing tube can reach very high<br />
temperatures: avoid touching it directly<br />
with your hands.<br />
• When you turn on the machine, the temperature<br />
control light (18) will flash until<br />
the machine heats up to the right temperature.<br />
• Before dispensing steam, make sure the<br />
green temperature ready light (18)<br />
remains lit and that the water container<br />
is full.<br />
• When the green temperature ready light<br />
(18) remains lit, the machine is ready to<br />
dispense steam.<br />
• 30 Position the steam tube (9) over the<br />
drip tray, open the “hot water/steam”<br />
knob (11) for a few seconds to discharge<br />
residual water from the steam tube; in a<br />
short time only steam will issue from the<br />
tube.<br />
• Close the knob (11).<br />
• Fill a pitcher or the receptacle you want<br />
to use for making cappuccino to 1/3 with<br />
cold milk.<br />
i<br />
Use only cold milk to ensure the best<br />
results when making cappuccino.<br />
• 32 Place the tip of the steam tube in<br />
the milk to be heated and open the knob<br />
(11); slowly raise the receptacle, with<br />
gentle rotating movements, to obtain a<br />
uniform layer of foam.<br />
• After dispensing the amount of steam<br />
desired, close the knob (11).<br />
• The same procedure may be used to heat<br />
other beverages.<br />
• After this operation, wipe the steam tube<br />
clean with a damp cloth.<br />
8 DISPENSING HOT WATER<br />
Warning: The steam may be<br />
preceded by brief sprays of hot<br />
water: danger of scalding! The<br />
dispensing tube can reach very high<br />
temperatures: avoid touching it directly<br />
with your hands.<br />
<strong>Espresso</strong> <strong>Italia</strong> PTY LTD<br />
• If the machine www.espressoitalia.com.au<br />
is off, turn on; the tempera-<br />
Freecall 1300 660 976
Cleaning and maintenance / Dispending unit<br />
33<br />
ture control light (18) will flash until the<br />
machine heats up to the right temperature.<br />
• Before dispensing hot water, make sure<br />
that the green temperature ready light<br />
(18) remains lit and that the water<br />
container is full.<br />
• When the green temperature ready light<br />
(18) remains lit, the machine is ready to<br />
dispense coffee and steam.<br />
To dispense hot water, proceed as follows:<br />
• 31 Place a cup and/or a receptacle<br />
beneath the hot water/steam tube (9);<br />
• Press the button (19). The light (20) will<br />
go on, meaning that the machine is<br />
ready to dispense hot water;<br />
• Turn the knob (11) counterclockwise;<br />
• Dispense the desired amount of hot<br />
water; turn the knob (11) clockwise to<br />
cut off the flow of hot water.<br />
i<br />
When you have finished<br />
dispensing hot water, press the<br />
button (19) again to return to the<br />
normal machine setting.<br />
9 TURNING THE MACHINE<br />
ON AND OFF<br />
• To turn on the machine, simply press the<br />
button (15); the on/off light (16) will go on.<br />
• Simply press the button (15) to turn the<br />
machine off; the on/off light (16) will go off.<br />
10 CLEANING AND<br />
MAINTENANCE<br />
Basic cleaning<br />
• Maintenance and cleaning may be<br />
carried out only when the machine is cold<br />
and disconnected from the power supply.<br />
• Do not immerse the machine in water<br />
and do not place any of its components<br />
in a dishwasher.<br />
• Do not use sharp objects or aggressive<br />
chemical products (solvents) for cleaning.<br />
• It is recommended that you clean the<br />
water container daily; fill the container<br />
with fresh drinking water.<br />
• Clean out the coffee bean container<br />
before refilling it.<br />
• Use a soft cloth moistened with water to<br />
clean the machine.<br />
• Do not dry the machine and/or its<br />
components in a microwave and/or<br />
conventional oven.<br />
• 33 Clean the machine compartment<br />
and the brew group, we recommend<br />
emptying out the dump box every day (4).<br />
• 34 The coffee dispenser (6) may be<br />
removed for cleaning. Pull it out and<br />
thoroughly rinse the dispensing channels<br />
with hot water.<br />
11 BREW GROUP<br />
• The brew group (7) must be cleaned every<br />
time you fill the coffee bean container or,<br />
in any case, at least once a week.<br />
• Turn off the machine and pull out the<br />
plug.<br />
• 37 33 Remove the dump box (4) and drip<br />
tray (8), then open the service door (3).<br />
• 35 Take out the brew group (7),<br />
holding it by the handle and pushing<br />
the “PRESS” button. Use hot water only,<br />
without detergents, <strong>Espresso</strong> to clean <strong>Italia</strong> the PTY brew LTD<br />
group. www.espressoitalia.com.au<br />
Freecall 1300 660 976
34<br />
• 36 Make sure that there are no coffee<br />
residues on the two steel filters. You may<br />
remove the upper filter by unscrewing<br />
the plastic pin with the key provided.<br />
• Thoroughly wash and dry all the parts of<br />
the brew group.<br />
• Replace the filter and use the key<br />
provided to tighten the plastic pin firmly<br />
into place. Do not over tighten.<br />
• Thoroughly clean the machine<br />
compartment.<br />
• 38 Without pressing the “PRESS” button<br />
and holding the brew group by its<br />
handle, fit it back securely into place<br />
inside the compartment.<br />
• Then close the door and set the dump<br />
box and drip tray back into place.<br />
12 DESCALING<br />
Scale forms due to mineral content in the<br />
water; it is necessary to remove scale every<br />
4-6 months of use or whenever you observe<br />
a decreased flow of water. If you want to<br />
descale the machine yourself, you may use<br />
any commercially available non-toxic, nonharmful<br />
descaling agent for coffee machines.<br />
container at intervals (one cup at a time);<br />
turn the steam knob (11)<br />
counterclockwise to dispense; turn the<br />
knob (11) clockwise to cut off flow.<br />
• During each interval, allow the descaling<br />
agent to act for about 10-15 minutes.<br />
• When all of the descaling agent has been<br />
used up, rinse out the water container<br />
and fill it with fresh water.<br />
• Empty out 2/3 of the water in the tank<br />
by turning the steam knob (11)<br />
counterclockwise; turn the knob (11)<br />
clockwise to cut off flow.<br />
• Let the machine heat up and empty out<br />
the water remaining in the tank by turning<br />
the steam knob (11) counterclockwise;<br />
turn the knob (11) clockwise to cut off flow.<br />
i<br />
Descaling / Optional Accessories<br />
Should you use a descaling agent<br />
other than the one recommended<br />
you are advised in any case to follow the<br />
manufacturer’s directions on the package.<br />
13 OPTIONAL ACCESSORIES<br />
13.1 Dose adjustment<br />
Warning! Never use vinegar as<br />
a descaling agent.<br />
• Mix the descaling agent with water as<br />
directed on the package and pour the<br />
solution into the water container.<br />
1<br />
<br />
<br />
• Turn on the machine by pressing the button<br />
(15); the on/off light (16) will go on.<br />
• Press the button (19); the light (20) will go on.<br />
2<br />
3<br />
<br />
<br />
• Position the steam tube (9) over the drip tray.<br />
• Empty the contents from the water<br />
The machine allows you to adjust the<br />
amount of coffee <strong>Espresso</strong> (dose) <strong>Italia</strong> to be ground PTY LTD per<br />
serving. The www.espressoitalia.com.au<br />
manufacturer has set a standard<br />
Freecall 1300 660 976
Optional Accessories<br />
dose that satisfies most needs: notch (3)<br />
corresponding to the point of reference (2).<br />
Turn the knob (1) inside the coffee container<br />
counterclockwise to increase the dose of<br />
ground coffee; turn it clockwise to reduce<br />
the dose of ground coffee. You must carry<br />
out the dose adjustment before pressing the<br />
button to dispense coffee (see par.6). This<br />
system makes it possible to achieve optimal<br />
coffee making with all types of coffee<br />
commercially available.<br />
35<br />
13.2.1 Steam/Cappuccino with the<br />
pannarello<br />
The steam may be used to froth milk for<br />
cappuccino and to heat up beverages.<br />
13.2 “Pannarello”<br />
The “pannarello” is a device enhancing the<br />
effect of the steam when you are frothing milk<br />
to make classic <strong>Italia</strong>n-style cappuccino.<br />
39<br />
Danger of scalding!<br />
The steam may be preceded<br />
by brief sprays of hot water. The<br />
dispensing tube can reach very high<br />
temperatures: avoiding touching it<br />
directly with your hands.<br />
To dispense steam using the pannarello,<br />
follow the directions provided in par.7;<br />
steam will issue from the pannarello.<br />
13.2.2 Hot water with the pannarello<br />
To install the pannarello, proceed as follows:<br />
• Make sure no other devices are fitted on<br />
the steam tube.<br />
• Loosen the ring nut (39) without slipping<br />
it off the pannarello.<br />
• Insert the pannarello in the steam tube<br />
to a depth of about 3 cm.<br />
• Tighten the ring nut securely.<br />
• Remove the outer sleeve (item 40) so that<br />
you can hold the inner sleeve still when<br />
tightening the nut.<br />
Note: if the ring nut is not<br />
securely tightened, the<br />
pannarello may slip out during use.<br />
To dispense hot water using the pannarello,<br />
follow the directions <strong>Espresso</strong> provided <strong>Italia</strong> in par.8; PTY hot LTD<br />
water will flow www.espressoitalia.com.au<br />
from the pannarello.<br />
Freecall 1300 660 976
36<br />
13.2.3 Cleaning the pannarello.<br />
After using the pannarello, you should<br />
clean it thoroughly to ensure maximum<br />
hygiene and functionality over time. The<br />
cleaning steps are as follows:<br />
Optional Accessories<br />
• Make sure that no other devices are fitted<br />
on the steam tube; you must remove any<br />
devices that have been installed.<br />
I.E. the “Pannarello”.<br />
• Loosen the ring nut (39) without slipping<br />
it off the cappuccinatore.<br />
• Insert the cappuccinatore in the steam<br />
tube to a depth of about 3 cm.<br />
• Tighten the ring nut securely.<br />
39<br />
39<br />
40<br />
• Loosen the ring nut (39) of the pannarello.<br />
• Remove the pannarello from the steam tube.<br />
• Take off the outer casing (40) of the<br />
pannarello.<br />
• Clean all parts of the pannarello<br />
thoroughly with running drinking water.<br />
• Reassemble the pannarello.<br />
• Insert the pannarello back into the steam<br />
tube.<br />
• Tighten the ring nut (39).<br />
• Remove the outer sleeve (item 40) so that<br />
you can hold the inner sleeve still when<br />
tightening the nut.<br />
Note: if the ring nut is not<br />
securely tightened, the<br />
cappuccinatore may slip out during<br />
use.<br />
13.3.1 Hot water with the<br />
cappuccinatore<br />
Note: if the ring nut is not<br />
securely tightened, the<br />
pannarello may slip out during use.<br />
13.3 Cappuccinatore<br />
i<br />
The cappuccinatore is a device<br />
that automatically froths milk,<br />
making it extremely easy to prepare<br />
classic <strong>Italia</strong>n-style cappuccino.<br />
To install the cappuccinatore, proceed as<br />
follows:<br />
i<br />
To dispense <strong>Espresso</strong> hot water <strong>Italia</strong> using PTY LTD the<br />
cappuccinatore, www.espressoitalia.com.au<br />
follow the<br />
Freecall 1300 660 976
Optional Accessories<br />
directions provided in par.8; hot water<br />
will flow out of the lower part of the<br />
cappuccinatore.<br />
While hot water is being dispensed, the<br />
silicone tube (41) inside the<br />
cappuccinatore must be inserted into the<br />
grating of the drip tray. Make sure the<br />
silicone tube cannot slip out while the<br />
machine is in use.<br />
13.3.2 Steam/Cappuccino with the<br />
cappuccinatore<br />
The steam may be used to froth milk for<br />
cappuccino and to heat up beverages.<br />
Danger of scalding!<br />
The steam may be preceded by<br />
brief sprays of hot water. The<br />
dispensing tube can reach very high<br />
temperatures: avoiding touching it<br />
directly with your hands.<br />
41<br />
37<br />
(18) remains lit, the machine is ready to<br />
dispense steam.<br />
• Position the cappuccinatore over the drip<br />
tray, open the “hot water/steam” knob<br />
(11) for a few seconds to discharge<br />
residual water from the cappuccinatore;<br />
in a short time only steam will issue from<br />
the tube.<br />
• Close the knob (11).<br />
• Place the intake tube (41) in a suitable<br />
receptacle or directly into a container of<br />
milk, placed next to the machine.<br />
• Place a cup containing previously<br />
prepared coffee beneath the nozzle of<br />
the cappuccinatore;<br />
• Open the knob (11); frothed milk will<br />
start issuing from the cappuccinatore.<br />
• Move the pin on the cappuccinatore to<br />
regulate the thickness of the foam; by<br />
pushing it upward you will increase its<br />
volume.<br />
i<br />
When preparing cappuccino, use<br />
cold milk to ensure the best<br />
results.<br />
• When you have finished using the<br />
cappuccinatore and steam, clean the<br />
cappuccinatore to remove residual milk.<br />
• When you turn on the machine, the temperature<br />
control light (18) will flash until<br />
the machine heats up to the right temperature.<br />
• Before dispensing steam, make sure the<br />
green temperature ready light (18) remains<br />
lit and that the water container is full.<br />
• When the green temperature ready light<br />
• Place a container filled with fresh drinking<br />
water alongside the machine and place<br />
the tip of the intake tube (41) inside the<br />
container.<br />
• Proceed as if you were making cappuccino,<br />
allowing the dirty water to flow into<br />
a receptacle or directly into the drip tray.<br />
13.3.3 Cleaning the cappuccinatore.<br />
<strong>Espresso</strong> <strong>Italia</strong> PTY LTD<br />
After using the www.espressoitalia.com.au<br />
cappuccinatore, you should<br />
Freecall 1300 660 976
38<br />
Legal information / Disposal of the appliance<br />
clean it thoroughly to ensure maximum<br />
hygiene and functionality over time.<br />
The cleaning steps are as follows:<br />
• Loosen the ring nut of the<br />
cappuccinatore.<br />
• Remove the cappuccinatore from the<br />
steam tube.<br />
• Remove the casing of the<br />
cappuccinatore.<br />
• Take off the cover, pin and intake tube.<br />
• Clean all the parts of the cappuccinatore<br />
thoroughly with running drinking water.<br />
• Reassemble the cappuccino maker.<br />
• Insert the cappuccinatore back in the<br />
steam tube.<br />
• Tighten the ring nut securely.<br />
• If more information is required or if a<br />
particular problem not dealt with or<br />
insufficiently explained in these<br />
instructions should arise, the customer<br />
should contact his/her local dealer or<br />
the manufacturer directly.<br />
• We would also like to bring to the<br />
customer’s attention that these<br />
instructions are not part of any previous<br />
or existing convention, agreement or<br />
legal contract and hence have no legal<br />
bearing.<br />
• The obligations of the manufacturer are<br />
based on the relative contract of sale<br />
which includes the complete and<br />
exclusive regulation regarding guarantee<br />
requirements.<br />
• The terms of the guarantee are in no<br />
way affected by these instructions.<br />
• The instructions contain information<br />
protected by copyright laws.<br />
41<br />
Note: if the ring nut is not<br />
securely tightened, the<br />
cappuccinatore may slip out during<br />
use.<br />
14 LEGAL INFORMATION<br />
•These instructions include information on<br />
how to use the machine correctly, its<br />
functions and its maintenance.<br />
• If these instructions are followed closely<br />
no risks should be run in using the<br />
appliance and all necessary safety<br />
requirements regarding function and<br />
maintenance should be upheld.<br />
• The instructions may not be photocopied<br />
or translated into a foreign language<br />
without the manufacturer’s written<br />
permission.<br />
15 DISPOSAL OF THE<br />
APPLIANCE<br />
• An appliance that is no longer in use<br />
must be rendered unworkable.<br />
• Remove the plug and cut the power cord<br />
at the base.<br />
• Take unused appliances to a qualified<br />
disposal center.<br />
<strong>Espresso</strong> <strong>Italia</strong> PTY LTD<br />
www.espressoitalia.com.au<br />
Freecall 1300 660 976
Problems - Causes - Remedies<br />
39<br />
Problems Causes Remedies<br />
The machine does not turn on<br />
The machine not getting power<br />
The service door is open<br />
Connect the machine to an<br />
operating electrical outlet<br />
Close the door<br />
The coffee cycle does not start<br />
The red warning light (26) is<br />
flashing:<br />
Brew group not positioned<br />
properly or not locked in place<br />
Drip tray not positioned<br />
properly<br />
Fit or lock the brew group in<br />
place<br />
Fit the drip tray correctly into<br />
place<br />
The coffee cycle does not start<br />
The red warning light (26) goes<br />
on:<br />
The coffee is not hot enough<br />
No hot water or steam is<br />
dispensed<br />
No coffee is dispensed<br />
Coffee drips out slowly<br />
Dump box not positioned<br />
properly<br />
The coffee container is empty<br />
The water container is empty<br />
The cups are cold<br />
The opening of the steam tube<br />
is clogged<br />
There is no water<br />
Brew group is dirty<br />
Machine not primed<br />
Coffee ground too finely<br />
Machine not primed<br />
Brew group dirty<br />
Fit the dump box correctly into place<br />
Refill the coffee container and<br />
restart the dispensing cycle<br />
Refill the water container, prime<br />
the machine and restart the<br />
dispensing cycle<br />
Pre-heat the cups<br />
Clean the opening of the steam<br />
tube with a pin<br />
Refill the water container and<br />
reload the circuit (Par.4.4.)<br />
Clean the unit (Par.11)<br />
Prime the machine (Par.4.4)<br />
Adjust grind setting to a coarser<br />
(higher number) grind.<br />
Prime the machine (Par.4.4)<br />
Clean the brew group (Par.11)<br />
The blend is not suitable or the<br />
coffee is not freshly roasted or<br />
is ground too finely.<br />
Change the coffee blend or<br />
adjust the grinder as directed<br />
in par.5 (Reduce the dose –<br />
Optional) <strong>Espresso</strong> <strong>Italia</strong> PTY LTD<br />
www.espressoitalia.com.au<br />
Freecall 1300 660 976
40 Problems - Causes - Remedies<br />
Problems Causes Remedies<br />
The coffee is not creamy on the<br />
surface<br />
Coffee leaks outside the brew<br />
group<br />
The machine takes too long to<br />
heat up or the quantity of water<br />
dispensed from the tube is<br />
limited<br />
The brew group cannot be<br />
taken out<br />
The blend is not suitable or the<br />
coffee is not freshly roasted or<br />
is ground too coarsely.<br />
Brew group unit clogged<br />
The machine water system is<br />
clogged by scale<br />
Brew group out of place<br />
Dump box still in place<br />
Change the coffee blend or<br />
adjust the grinder as directed<br />
in par.5 (Increase the dose –<br />
Optional)<br />
Clean the brew group and its<br />
outlets<br />
Descale the machine (Par.12)<br />
Turn on the machine. Close the<br />
service door. The brew group<br />
will automatically go back into<br />
place.<br />
Remove the dump box before<br />
taking out the dispensing unit<br />
If you should have a problem that is not dealt with in the above table or is not<br />
resolved by any of these solutions please contact an authorized service center.<br />
<strong>Espresso</strong> <strong>Italia</strong> PTY LTD<br />
www.espressoitalia.com.au<br />
Freecall 1300 660 976
Note<br />
41<br />
<strong>Espresso</strong> <strong>Italia</strong> PTY LTD<br />
www.espressoitalia.com.au<br />
Freecall 1300 660 976
COD. 1.6.593.77.00 REV. 01 DEL 15/06/00<br />
<strong>Espresso</strong> <strong>Italia</strong> PTY LTD<br />
www.espressoitalia.com.au<br />
Freecall 1300 660 976


